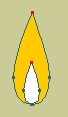
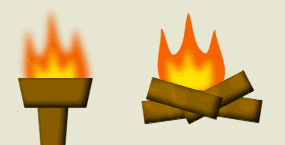
Candle flame
- Create 2 simple shapes on their own layer - I just used simple circles, peaked the top point, and scaled and translated to suit.
- Fill the inner shape white, with soft edges
- Fill the outer shape yellow (feel free to change these colours to your own preference - I'm no artist), leave it sharp
- Set the layer properties to noisy shapes and animated noise
- You may want to reduce the noise offset and increase the scale, to get a smoother wobble rather than a spiky jaggle
- If you wish, move the points around to get more animation to the tip of the flame as you see fit
MOV, 103k
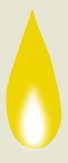
Larger Flame
- Most of this follows similar principles to the candle flame above
- You'll probably want a bit more shape to larger flames
- As per candle flame : 2 shapes, inner with soft edges - I personally use these sorts of colours for larger flames, but I'm no artist and I suspect I'm tending towards visual amateur cliches.
- Depending on your style, you might also wish to give the outer flame soft edges too.
- As per candle flame : Noisy shapes, animated noise
- The bobbing shape of the base of the fire is going to be a lot more obvious in this case, so you're probably going to want to hide it with objects on another layer
MOV file, 140k
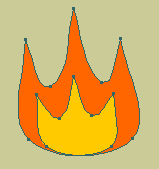
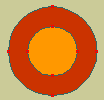
Explosions
- This is based on very similar principles to the flames above
- More of a circular shape, 2 shapes, inner with soft edges, layer with animated noisy shapes
- You may wish to add a soft edge to the outer shape too, depending on your style
- Add a splotchy fill to both shapes
- Scale the shape from small to larger and keyframe the visibility for the initial appearance
- Scale smaller and fade out with animated alpha approaching the finish
- Finish by keframing visibility
- Debris is left as an exercise for the reader 8-D

MOV file, 78k
Smoke
- Put your smoke shape on a separate layer, of course
- Put the origin of the layer at the base of the smoke
- FIll the shape with grey with a fair amount of transparency (i.e. low alpha)
- Give it a splotchy fill and soft edges
- Use layer scaling to make the smoke rise

MOV file, 80k
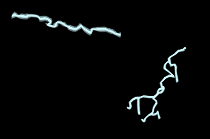
Lightning and arcs
- Give each bolt of lightning or electrical arc a layer of its own
- Create a simple line where you want the arc to approximately go - for lightning you may wish to add extra forking lines coming off the main line - make sure these extra sidelines actually join to the main line at a junction control point
- Give it a white (or maybe light blue) colour
- Change the layer properties to have noisy outlines and animated noise - play with the settings here
- Animate the general position and shapes of the lines if necessary e.g. to make the ends of an arc crawl along, or to scale the lightning bolt from small to a full bolt
- Animate the visibility of the layer to if desired
MOV file, 80k
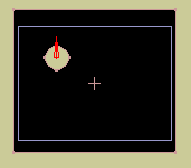
Spotlight / electrical torch light
(Modified from a tip formerly provided on the Lost Marble website - thanks!)- Create a large rectangle, bigger than the render area.
- Add a smaller circle
- Choose it all as one shape and fill it with black or grey - this gives a cutout circle
- Give the layer a lower alpha value
- Assign the circle points only to a bone
- Move the bone to simulate a flashlight or spotlight area
MOV file, 93k
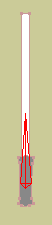
Lightsabre
- Create the lightsabre standing vertically
- Create the handle (or hilt, if you prefer) on one layer - make it as fancy or simple as you like
- Create the blade on a separate layer to the handle - a thin rectangle will do, significantly overlapping the handle - use a rounded tip if you prefer.
- Give it the standard white fill with no edge
- Set the first fill to halo - try about 1 pixel inset and 2 pixels blurred (depending, of course, on the size of your render and the closeness of the camera)
- Set the second fill to soft edges - try only about 2 pixels thick to start with
Note : setting the fill types the other way around results in a less brilliant white centre and a softer look - more colour bleed into the centre - this may be what you prefer - the difference is more noticeable at 640x480 than 320240
- Create a bone to control the lightsabre
- Attach the handle to the bone
- Attach the blade to the same bone - the bone will now control the movement of the lightsabre
- Go into animation mode for the blade layer.
- Go to frame 2, select the 2 end points of the lightsabre, and (holding Shift) translate them down inside the handle
- Go back to frame one and click once on the workspace, thus creating a visible keyframe at frame one.
- Copy the keyframe at frame 1 to frame 3 - the keyframes at frames 2 (retracted) and 3 (extended) can now be copied and moved throughout an animation to control the blade extending and retracting
- Save the moho file e.g. lightsabre.moho
- You can now :
- import this lightsabre file into another file, containing a character
- scale and translate the layer to put the lightsabre in the character's hand at about the right size and position
- make the lightsabre bone layer a child of the character's bone layer
- assign the lightsabre layer to the character's hand bone
- animate the character's hand to animate the lightsabre
- To have the character grab and let go of the lightsabre, seePicking it up and putting it down - send in the invisible clones (you can just use a copy of the handle layer as the second copy)


MOV file, 145k