The
etching of copper clad printed circuit board.
2007
for the practical radio amatuer in Australia
The
radio amatuer in Australia is now left with some stark choices when it
comes to the home production of copper printed circuit boards.
There are superb personal computer based PCB design softwares
that will print artwork onto overhead transparency film on a laser
printer. Thats all well and good but have you tried to get
photo
sensitive resist materials in Australia lately ? It is just
about
impossible. RCS Radio in Sydney can sell you some pre
sensitized
material but it is very costly and has limited shelf life.
The marvelous Riston coated board material is no longer
being
produced. This was a magic material, moderate exposure under a disco
black light tube would result in high contrast rock hard traces.
There were many other photoresists available in the eighties
including some excellent positive resists that came in a spray can.
I wrote to the marketing manager of Electrolube which make a
superb positive photo resist but the reply was to the effect that it
was not worth their time and money to market the product in Oz.
Thats a very sad reflection on the state of manufacturing in
this
land. Jaycar sell small quantities of a presensitised board but it is
extremely costly.
The
Dalo etching pens are hard to use and I dont think I have ever been
really pleased with the result. The resist is hard and very resistant
to abuse but the pen has very uneven flow and dries and clags up very
rapidly. It is useless for "coloring in" larger not to be etched areas.
It is very good , however, for repairing resist areas that are too thin
or badly exposed. I used a bog standard Texta or other spirit
based marker pen for resist. The resist film is very thin but will last
long enough to etch good quality lands , pads and lines. A long time
ago I used bituminous paint to paint on the tracks. This was hard,
messy, error prone and a complete pain. It is still a very effective
resist and was in fact the very first photographic medium. Lately
I have been using a spirit based pen known here as "permanent
overhead transperancy marker". These pens come in assorted sizes. The
Black pen writes very well onto clean copper, the larger pens
write a nice thick steady line and can be used for filling large areas.
The ink dries and hardens quickly and is a superb resist. I will
never use Dalo pens again.
This little board was recently made with the overhead transpenracy pen as the only resist.
I am
experimenting with something called collotype, which is a
photosensitive material made with food grade gelatine which has been
activated with ammonium dichromate to render it photosensitive.
It is hard to use because gelatin is not one substance but a
mixture of variable molecular weight proteins that are cross linked
under the action of ultra violet light. It is , in fact, one
of
the oldest photosensitive resist materials and the collotype printing
process is almost as old as modern typography. Ammonuim
dichromate will also photosensitise poly vinyl alcohol glue,
but
I have not done any experiments along that line yet. PVA is a
more consistent material than gelatine and promises better results.
The
method that I have been using mostly ,off late, for rapid prototyping
is the Dremel method. Using a tungsten carbide cutter, quick and
efficient removal of copper is achieved. As you are literally carving
lands pads and tracks with the Dremel, this limits the scope of whats
achieaveable. It is totally unsuited for digital work, but
most
of the type of analog circuits constructed by hams are ameanable to the
Dremel. It is another variation on the dead bug style or the
more
pernikity "Manhattan Method" which uses precut PCB offcuts to create
lands. Dont use a steel cutter, the glass in PCB material will
instantly dull them. Insist on tungsten carbide!
There
still remains the problem of etching PCBs. The many
electronic
enthusiast suppliers in Australia are still happy to supply either
ferric chloride or ammonium persulphate etchants as either
concentrates or ready made solutions. Ammonium persulphate
should
only be purchased as the powder, the solutions have no shelf live at
all. Ferric Chloride still remains my favourite etchant despite its
tendancy to leave persistant stains and corrode anything metallic
within a ten light year radius. ( I am a firm believer in the telekinetic
powers of ferric chloride. I am sure it has the power to rust steel
tools a light year away! Probably can go back in time too!) Never do
etching with ferric chloride indoors, with the evolved acidic mist your tools will rust into history!
Ammonium
Persulphate is probably the "greener" etchant as this will harmlessly
degrade to bog standard common fertilizer. Ferric Chloride is
persistant (and nasty) and thats why I like it.
Ferric
Chloride etchant can be re used almost indefineately, indeed, I still
use a solution thats over ten years old! (How green is that!)
The
chemical reaction between copper metal and ferric chloride is a complex
one and is still not completely understood by the chemical community.
In it copper metal passes directly into solution without the evolution
of hydrogen gas as would be engendered by dissolution in acid.
You do not want to generate gas in any case because the gas
will
lift away the resist and ruin edge contrast. The copper metal is
ultimately oxidized to cupric chloride in solution after being first
oxidized to the partly soluble cuprous chloride. The
oxidising
potential of the ferric chloride is quickly consumed by the
copper metal and very soon the initially vigorous reactions slows down.
The etching action can be accelerated by agitation and heat,
and
this is the standard method.
Ferric
Chloride can be regenerated. The initial reaction with copper
metal reduces the ferric to the ferrous ion which is very reactive in
the pressence of atmospheric oxygen. This results in the
precipitation of a hydrated ferric oxide and hydroxide which is highly
insoluble and is the major component of the brown gunge that grows near
and in your etching container. It also grows over the fresh copper
surface inhibiting rapid etching.
Agitation by bubbling air
through the etching tank is now an established method for accelerating
the etching process. This has also the beneficial effect of
reoxidising the ferrous ions back to ferric. There is
however, a
stochiometric deficiency of chloride and hydrogen ions. This can be made
good
be acidifying the etchant with biulders grade hydrochloric acid.
The resulting etchant takes on
an evil looking deep green but has no turbidiy due to suspended ferric
oxide. In this form the same etchant can be reused almost
forever, that is until the high concentration of cupric chloride
inhibits further action, due I guess, to the common ion effect.
I
have not experienced that in any of my etching baths yet. There is a legitimate arguement that more cupric chloride is good too.
With
acidification with HCL and bath agitation with bubbled air,
satisfactory etching action can be achieved without any heating and the
etching solution does not need to be discarded but has a "near
infinite" life.
Unwanted spent etchant should be mixed
with calcium hydroxide/carbonate ( garden lime) before
disposal
and this will render this etchant safe as immobile iron and
copper hydroxide/carbonates and will also nicely neutralize the
remaining acid. Never pour unwanted etchant into a toilet bowl or
stainless steel sink , it will result in an intractable stain. (and
domestic woes )
The
spent ferric chloride solution may also be rejuvenated by adding
a wad of steel wool. This has a the effect of displacing copper metal
from solution, it is reducing cupric copper (+2) to cuprous
copper (+1) and copper metal. Quickly filter out the precipitated
copper metal and add hydrochloric acid and aerate. This will regenerate
the the ferric chloride.
In
other new, I recently came across a website that exhibited
the novel, yet totally feaseable method of using Cupric Chloride as the
etchant. When I refind the link, I shall repost it here. In
summary, Cupric Chloride reacts with metallic copper forming
cuprous chloride. This reacts with disolved oxygen in the etchant
solution and is oxidised to the more soluble Cupric Chloride. The
stochiometric deficiency of chloride ions is made up by either direct
reaction with chlorine gas or more practically , hydrochloric
acid. This etchant solution, potentially lasts forever and gets better with use , still no free lunch, air and HCL are still required.
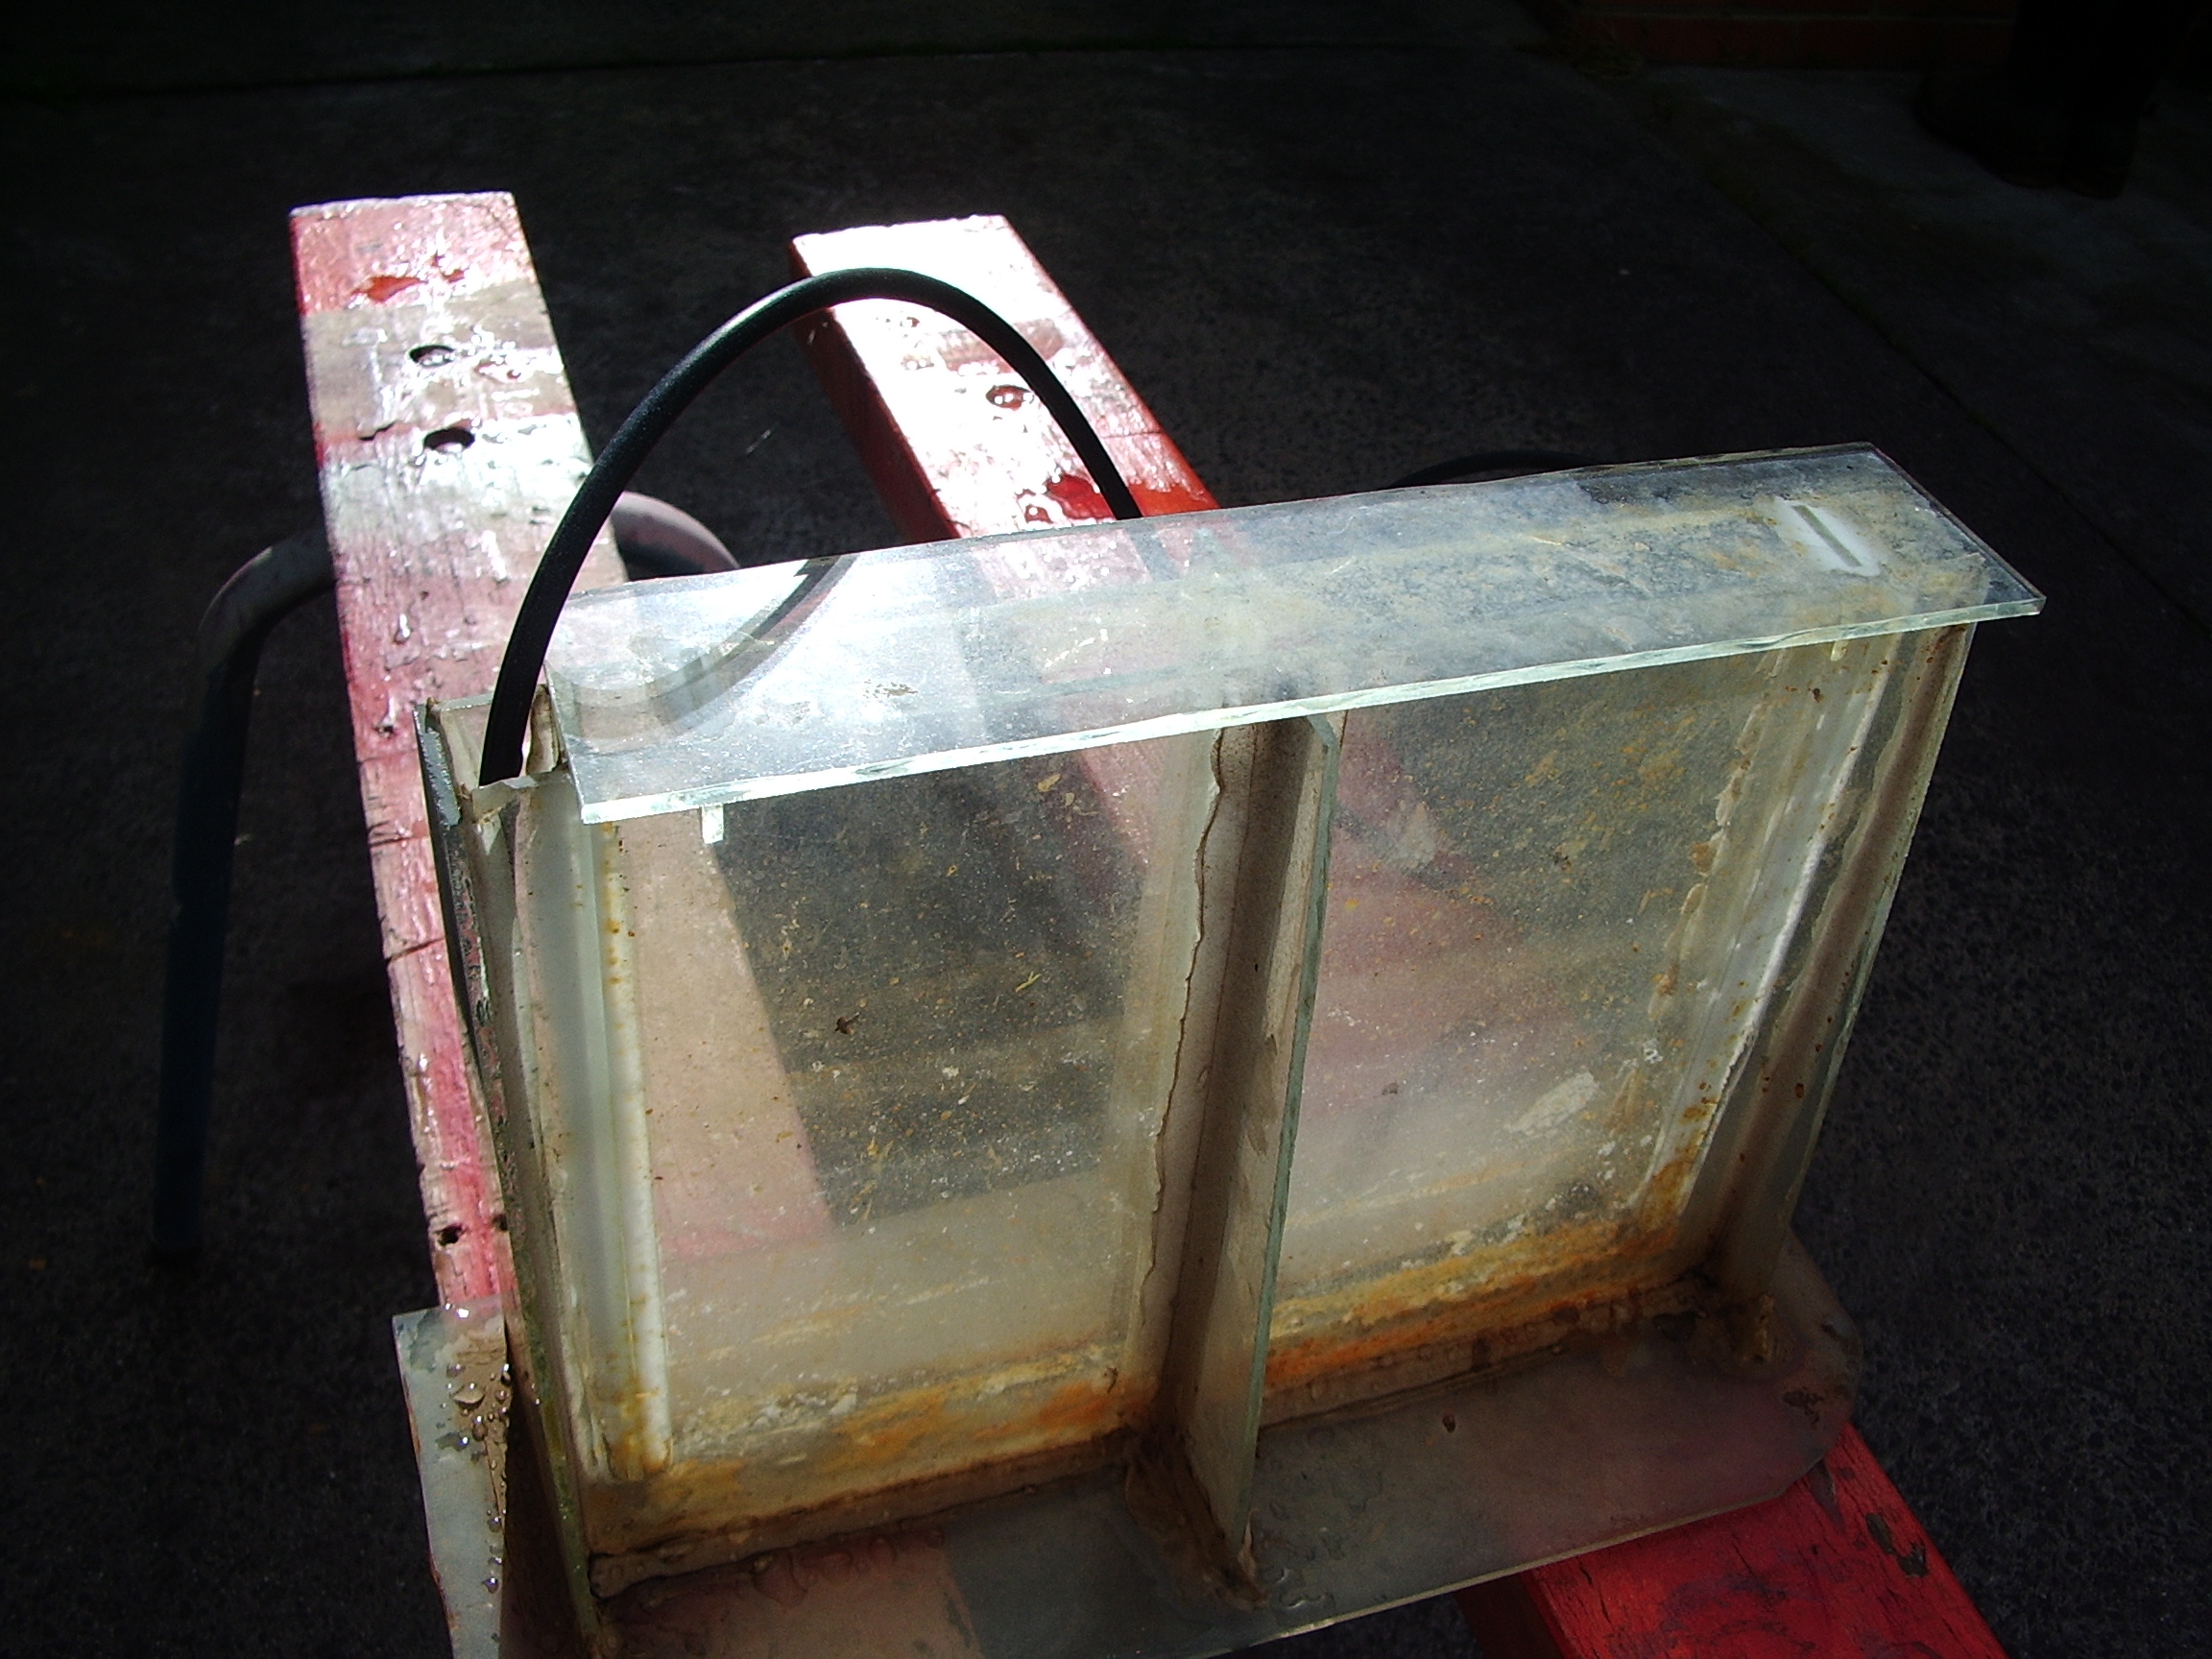
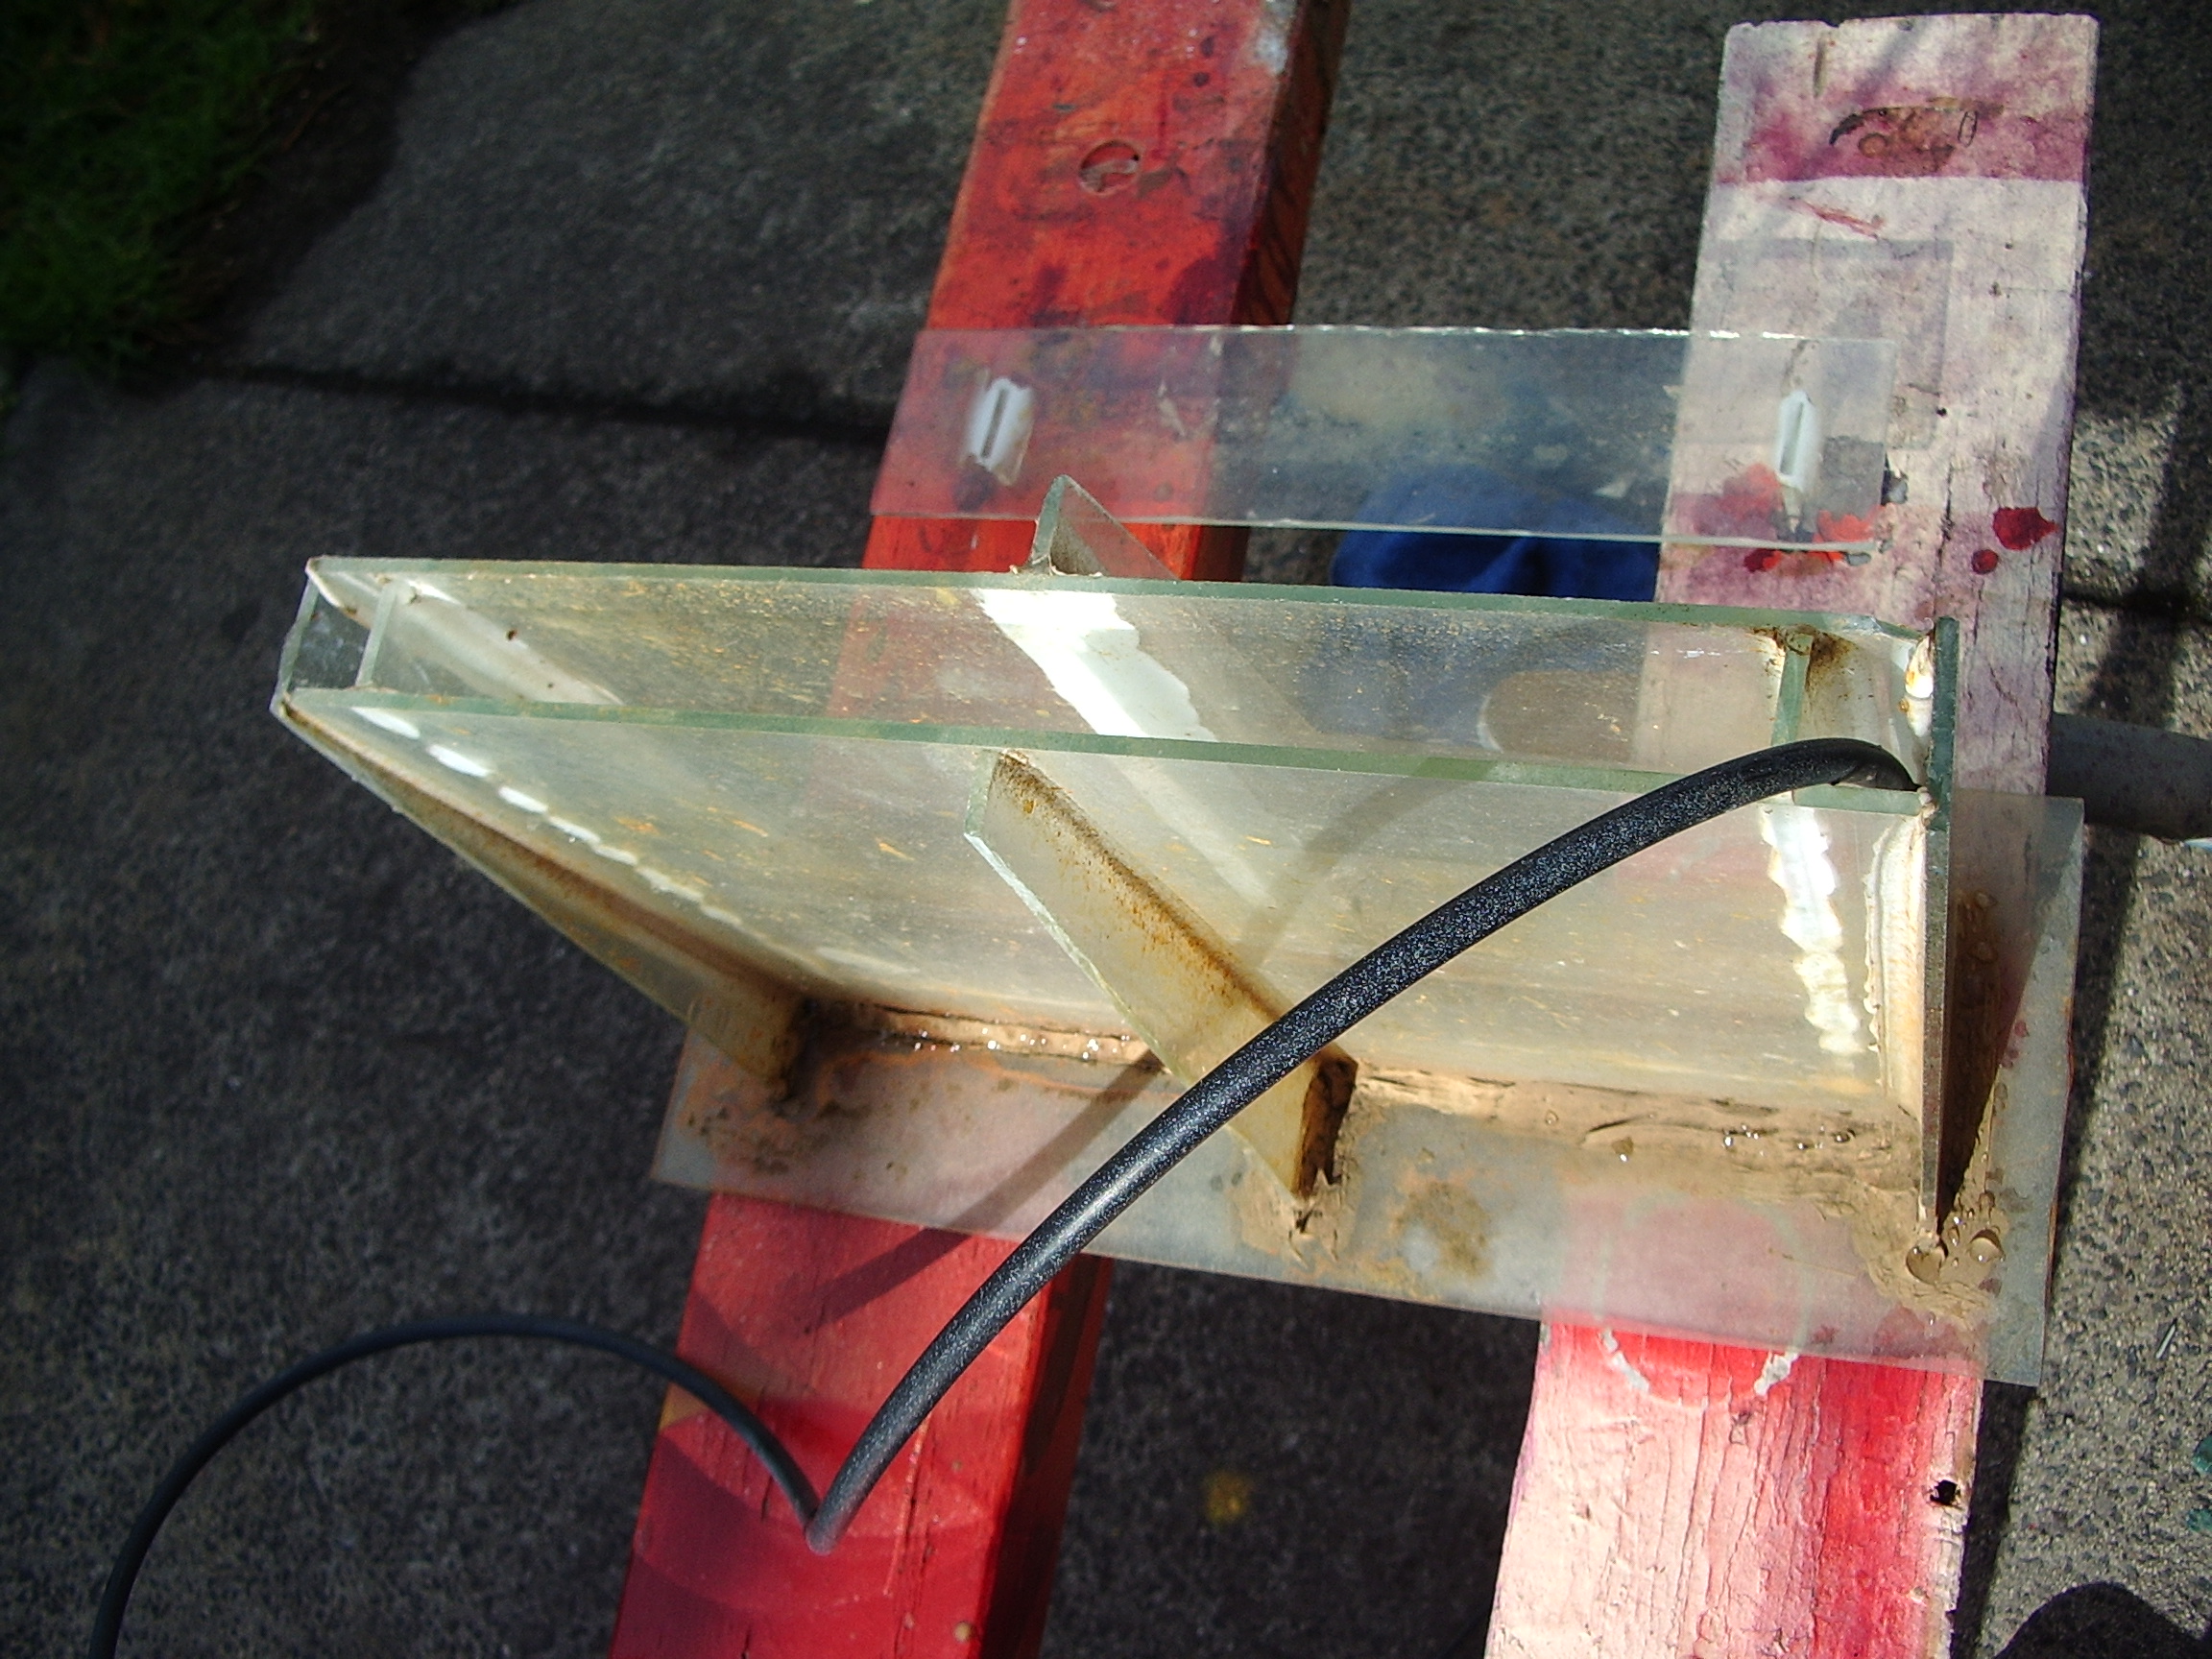
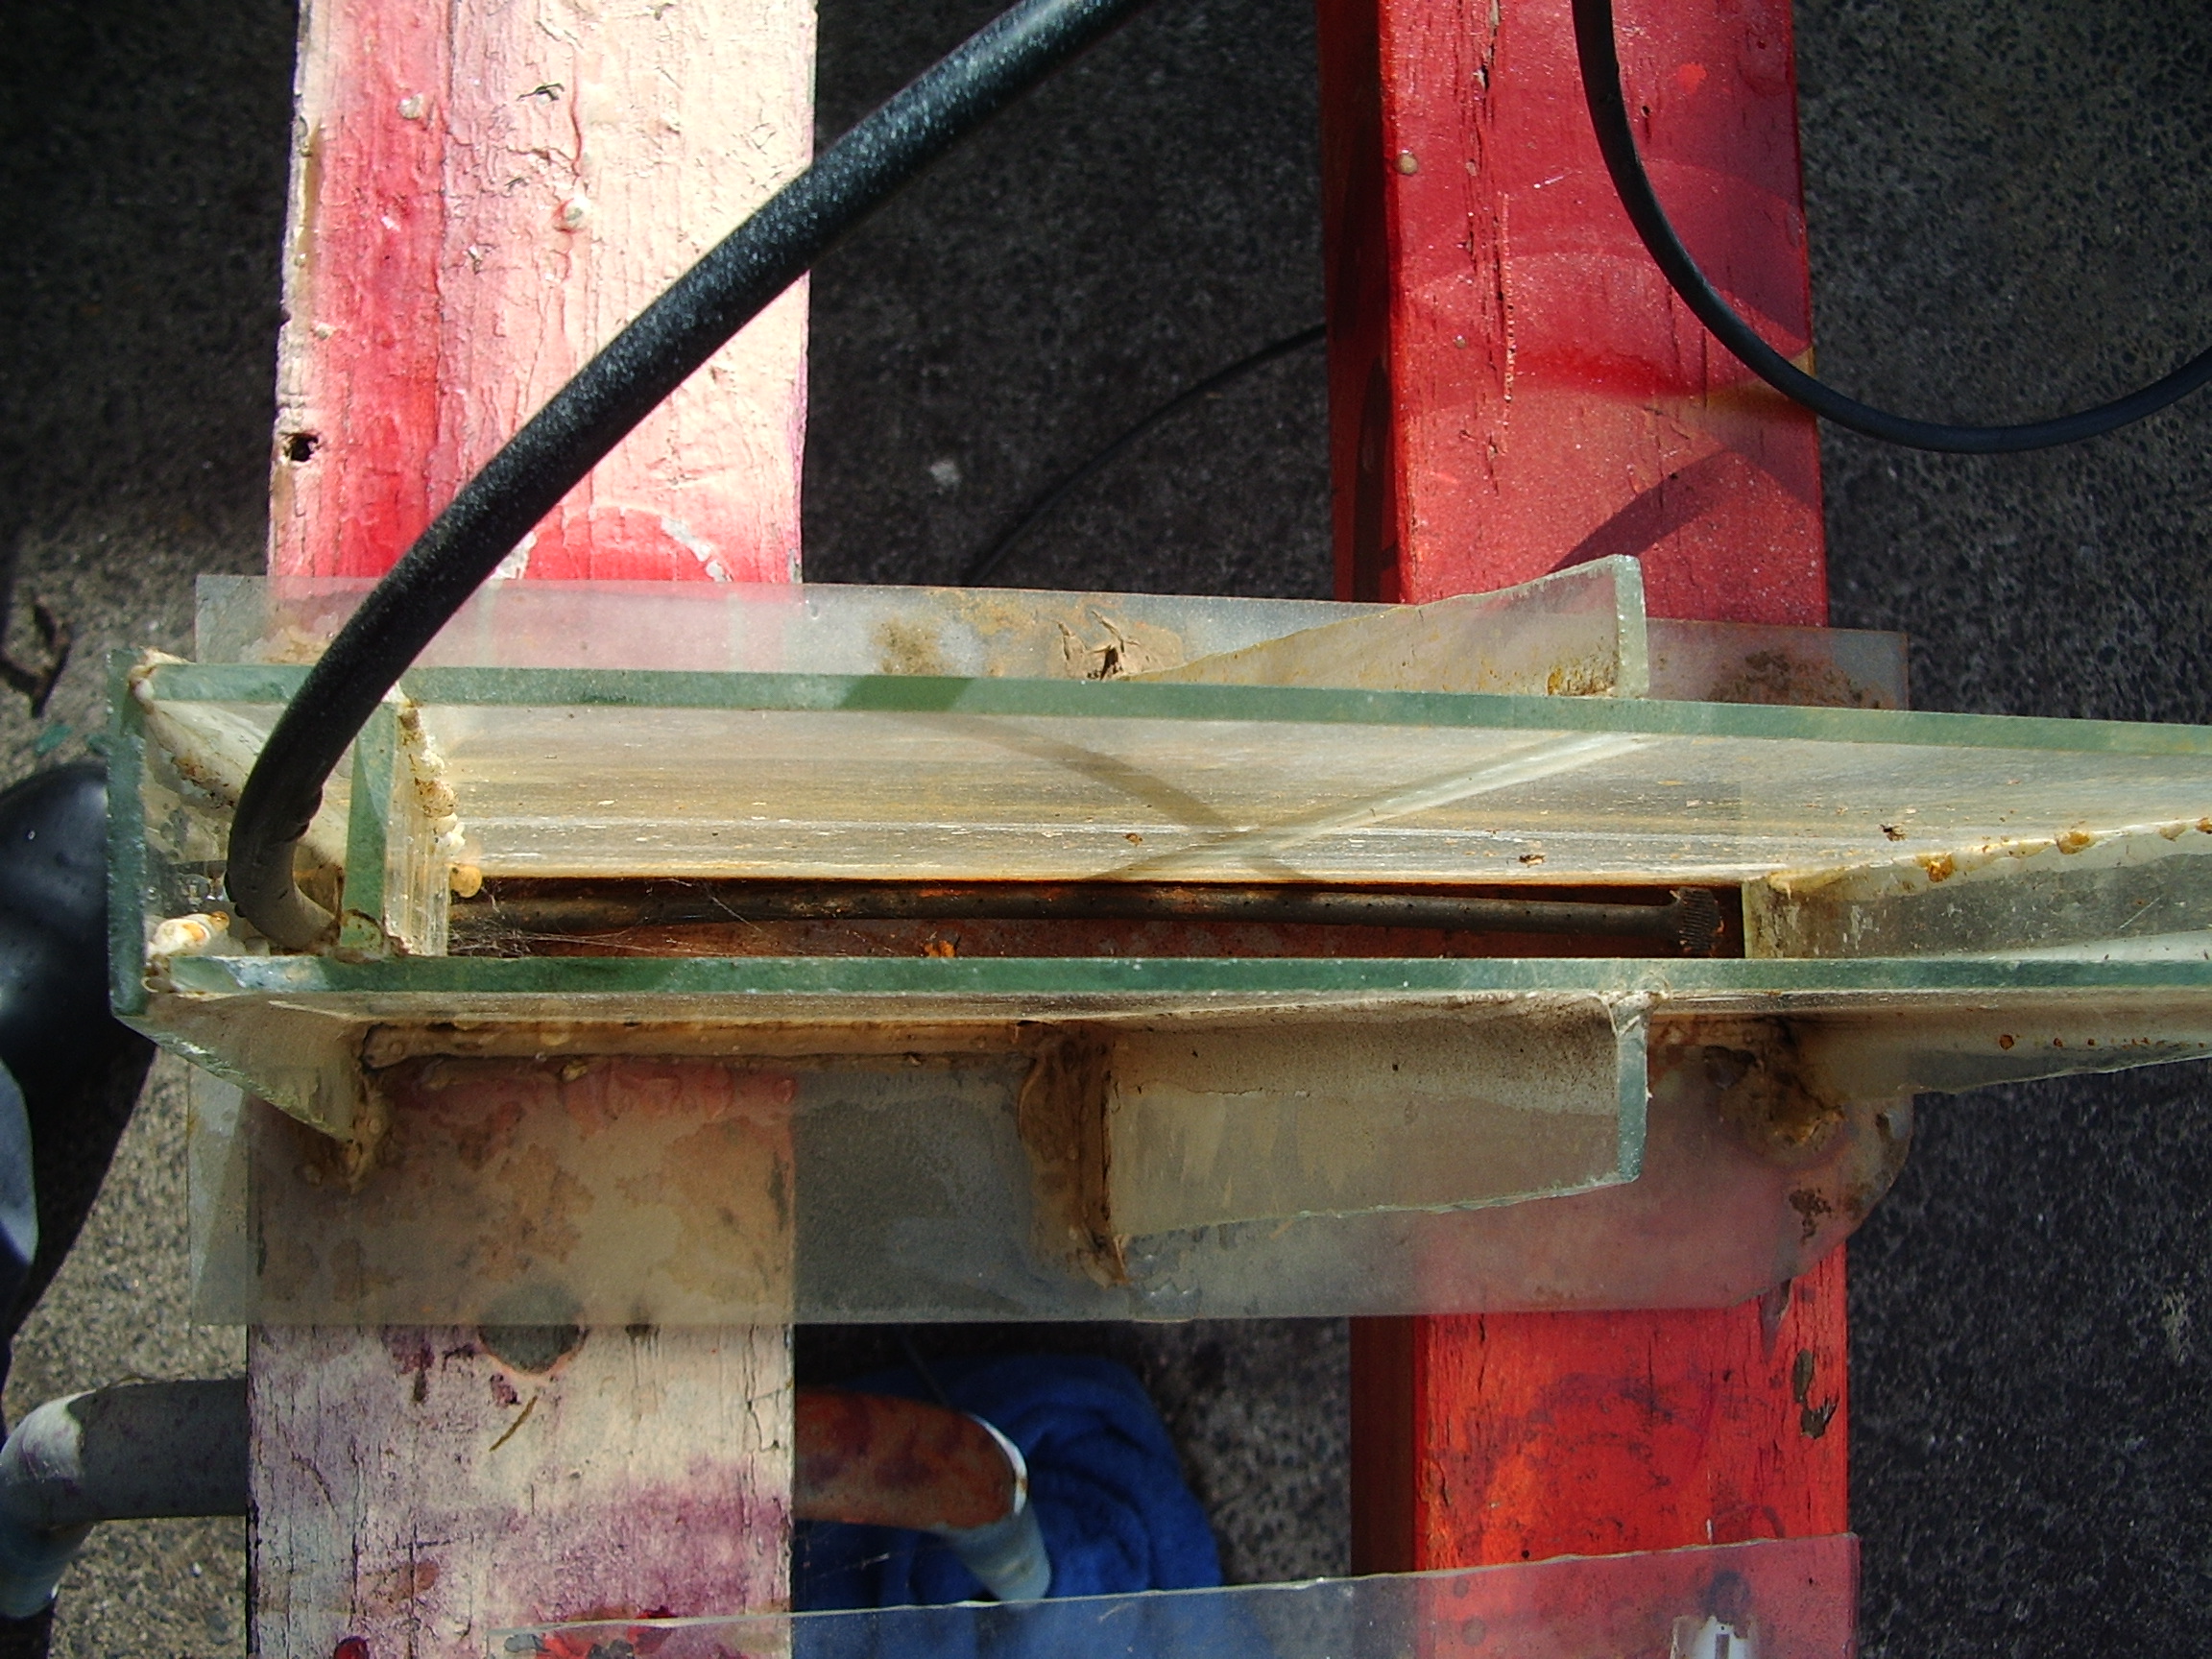
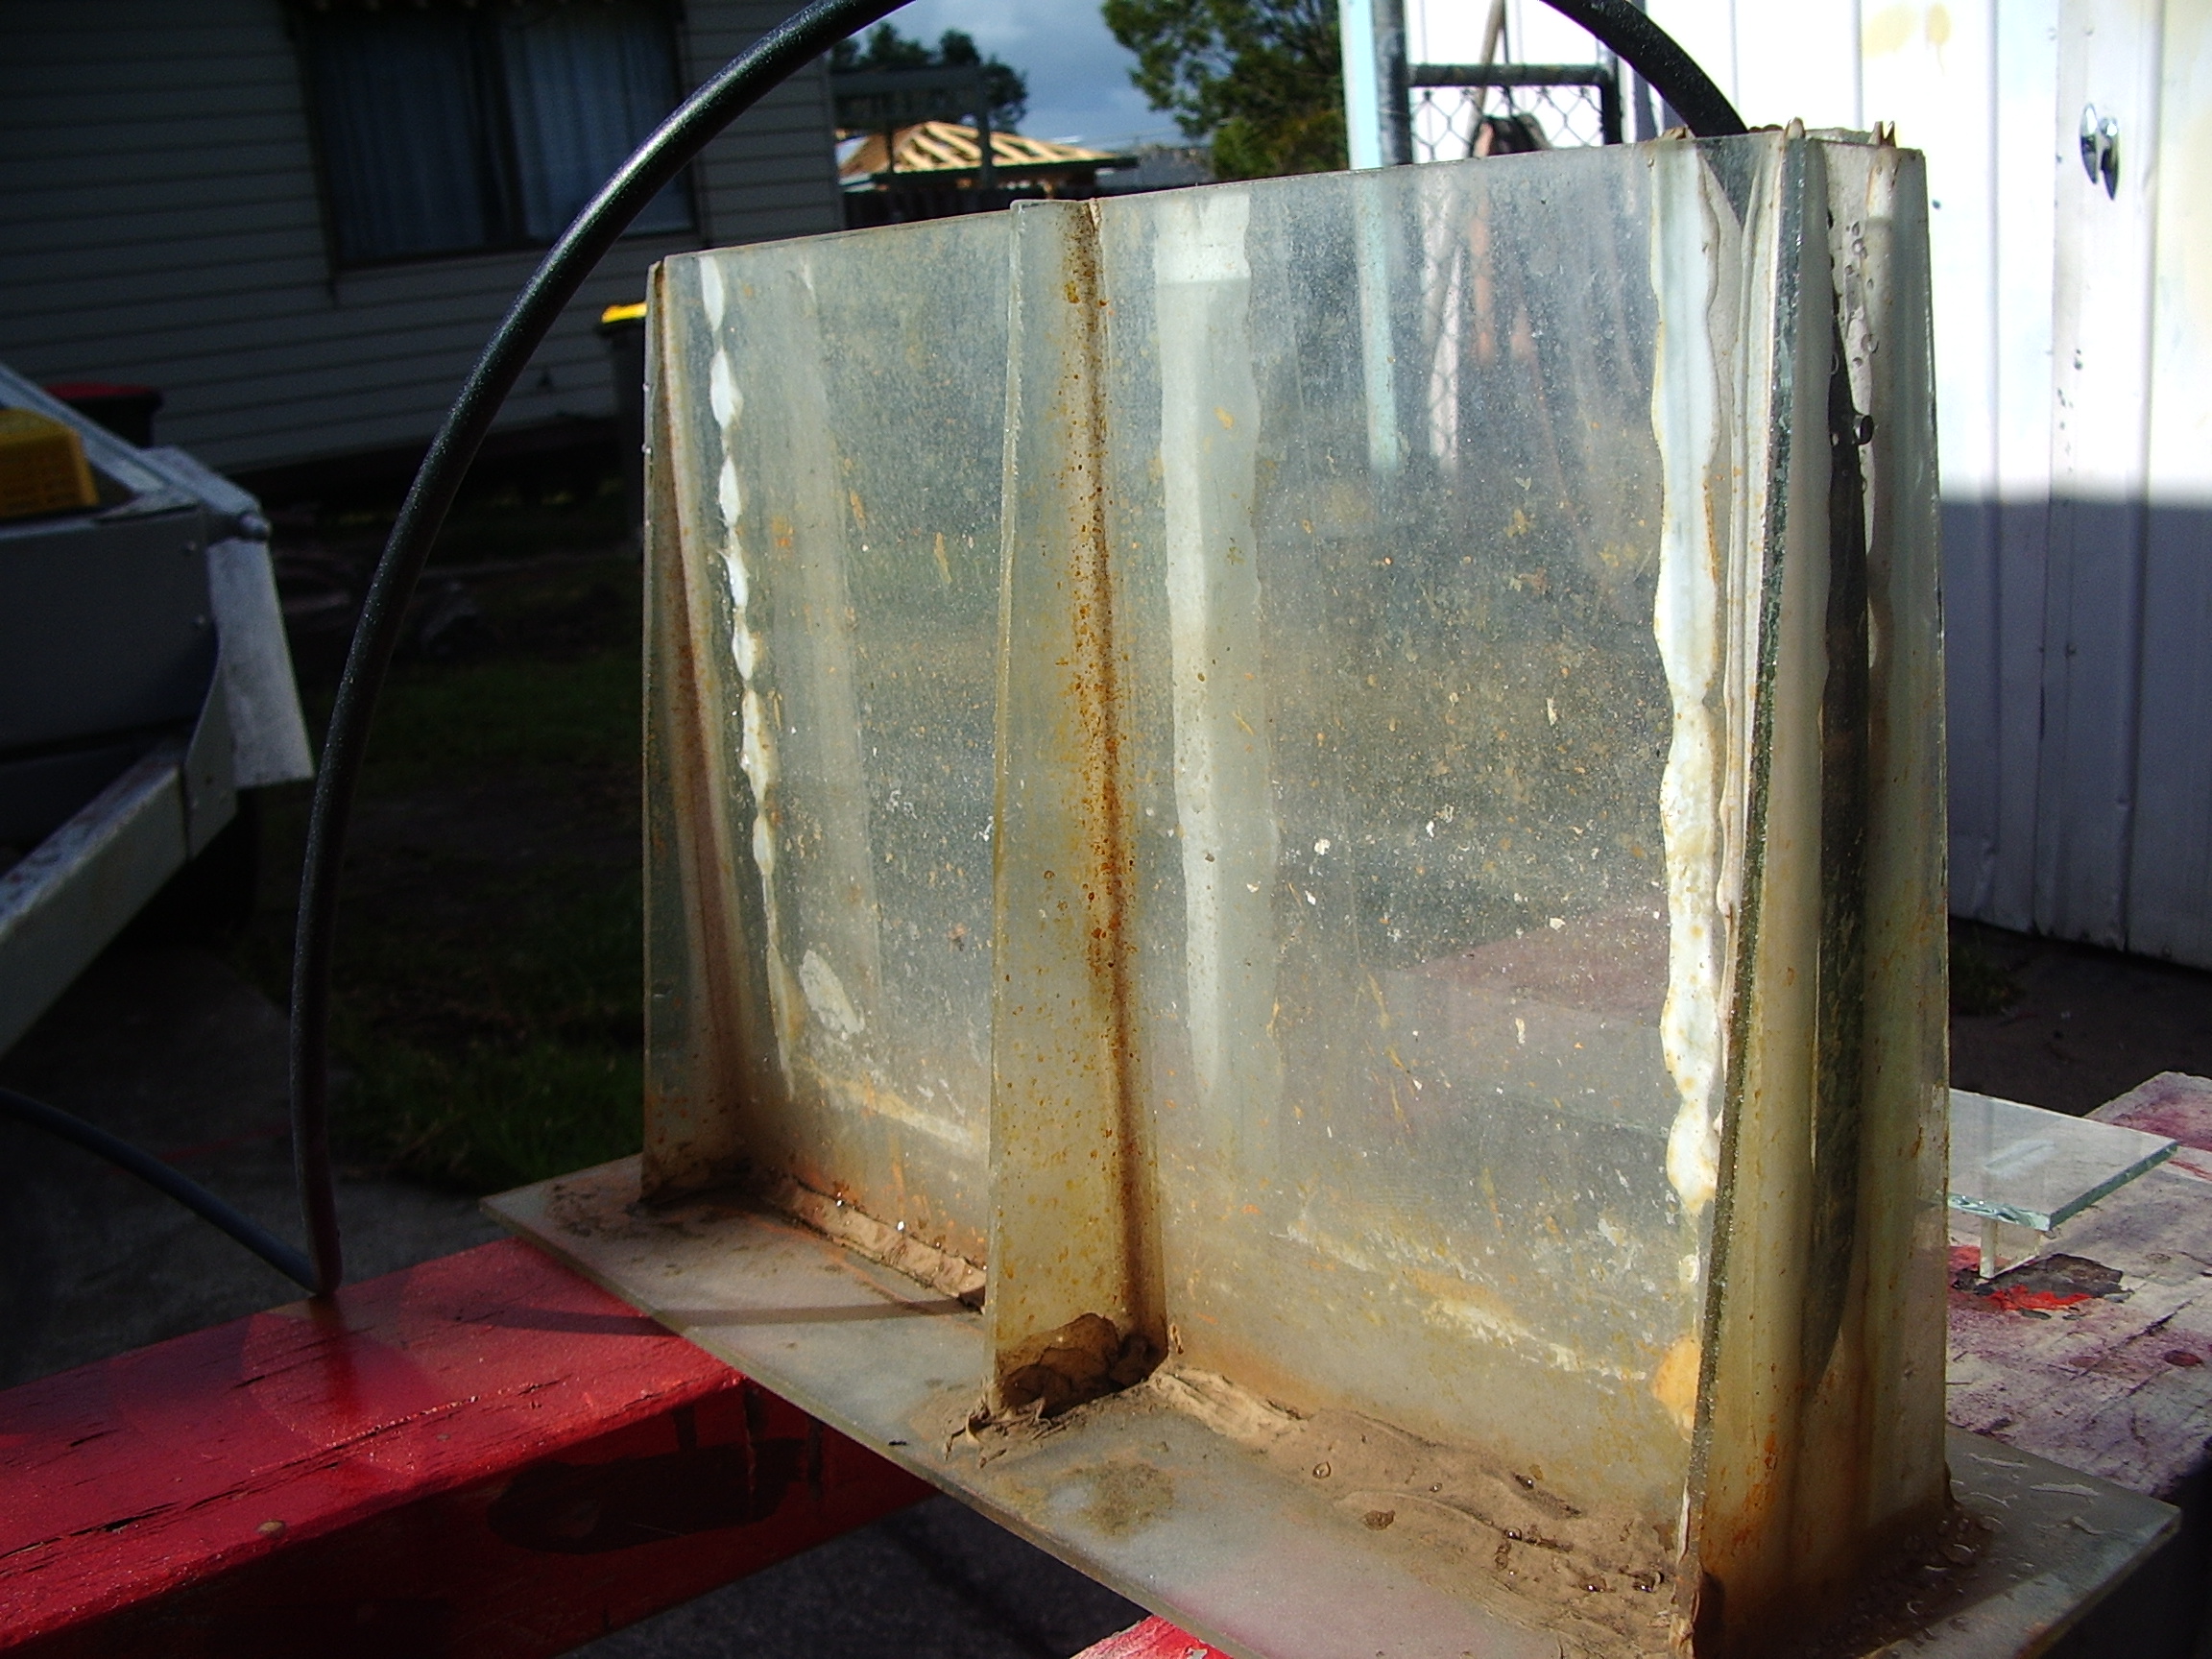
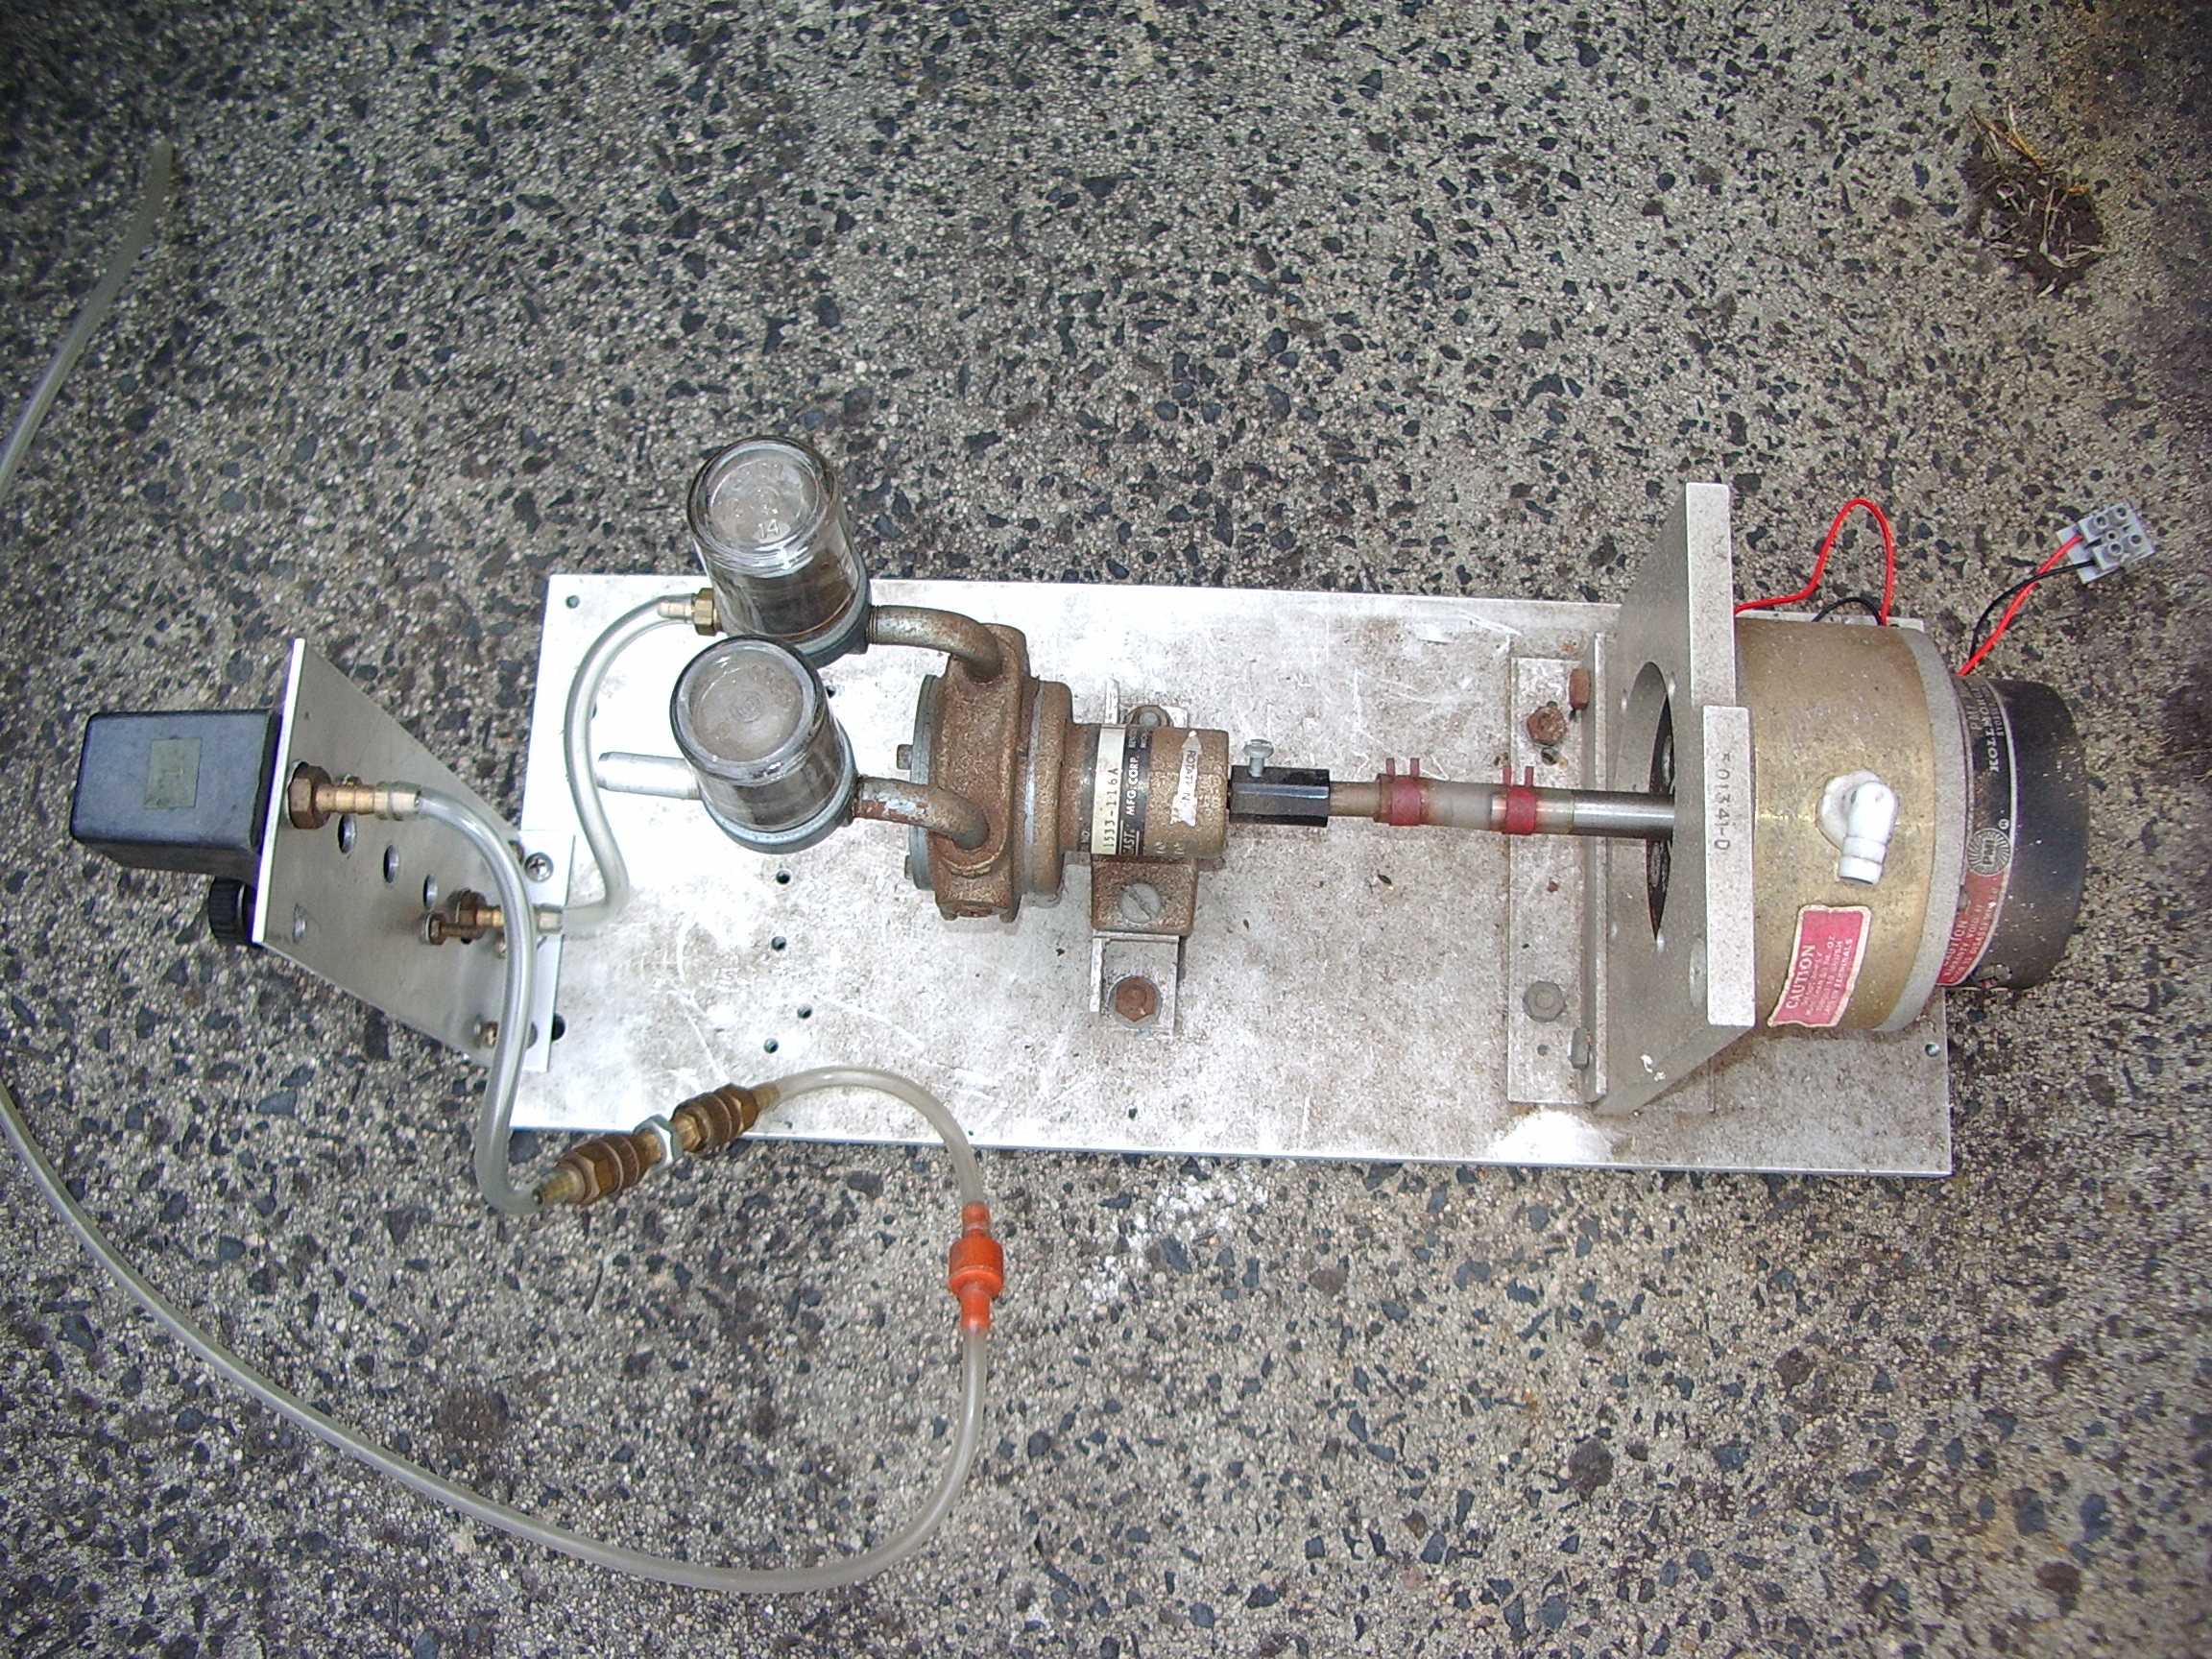
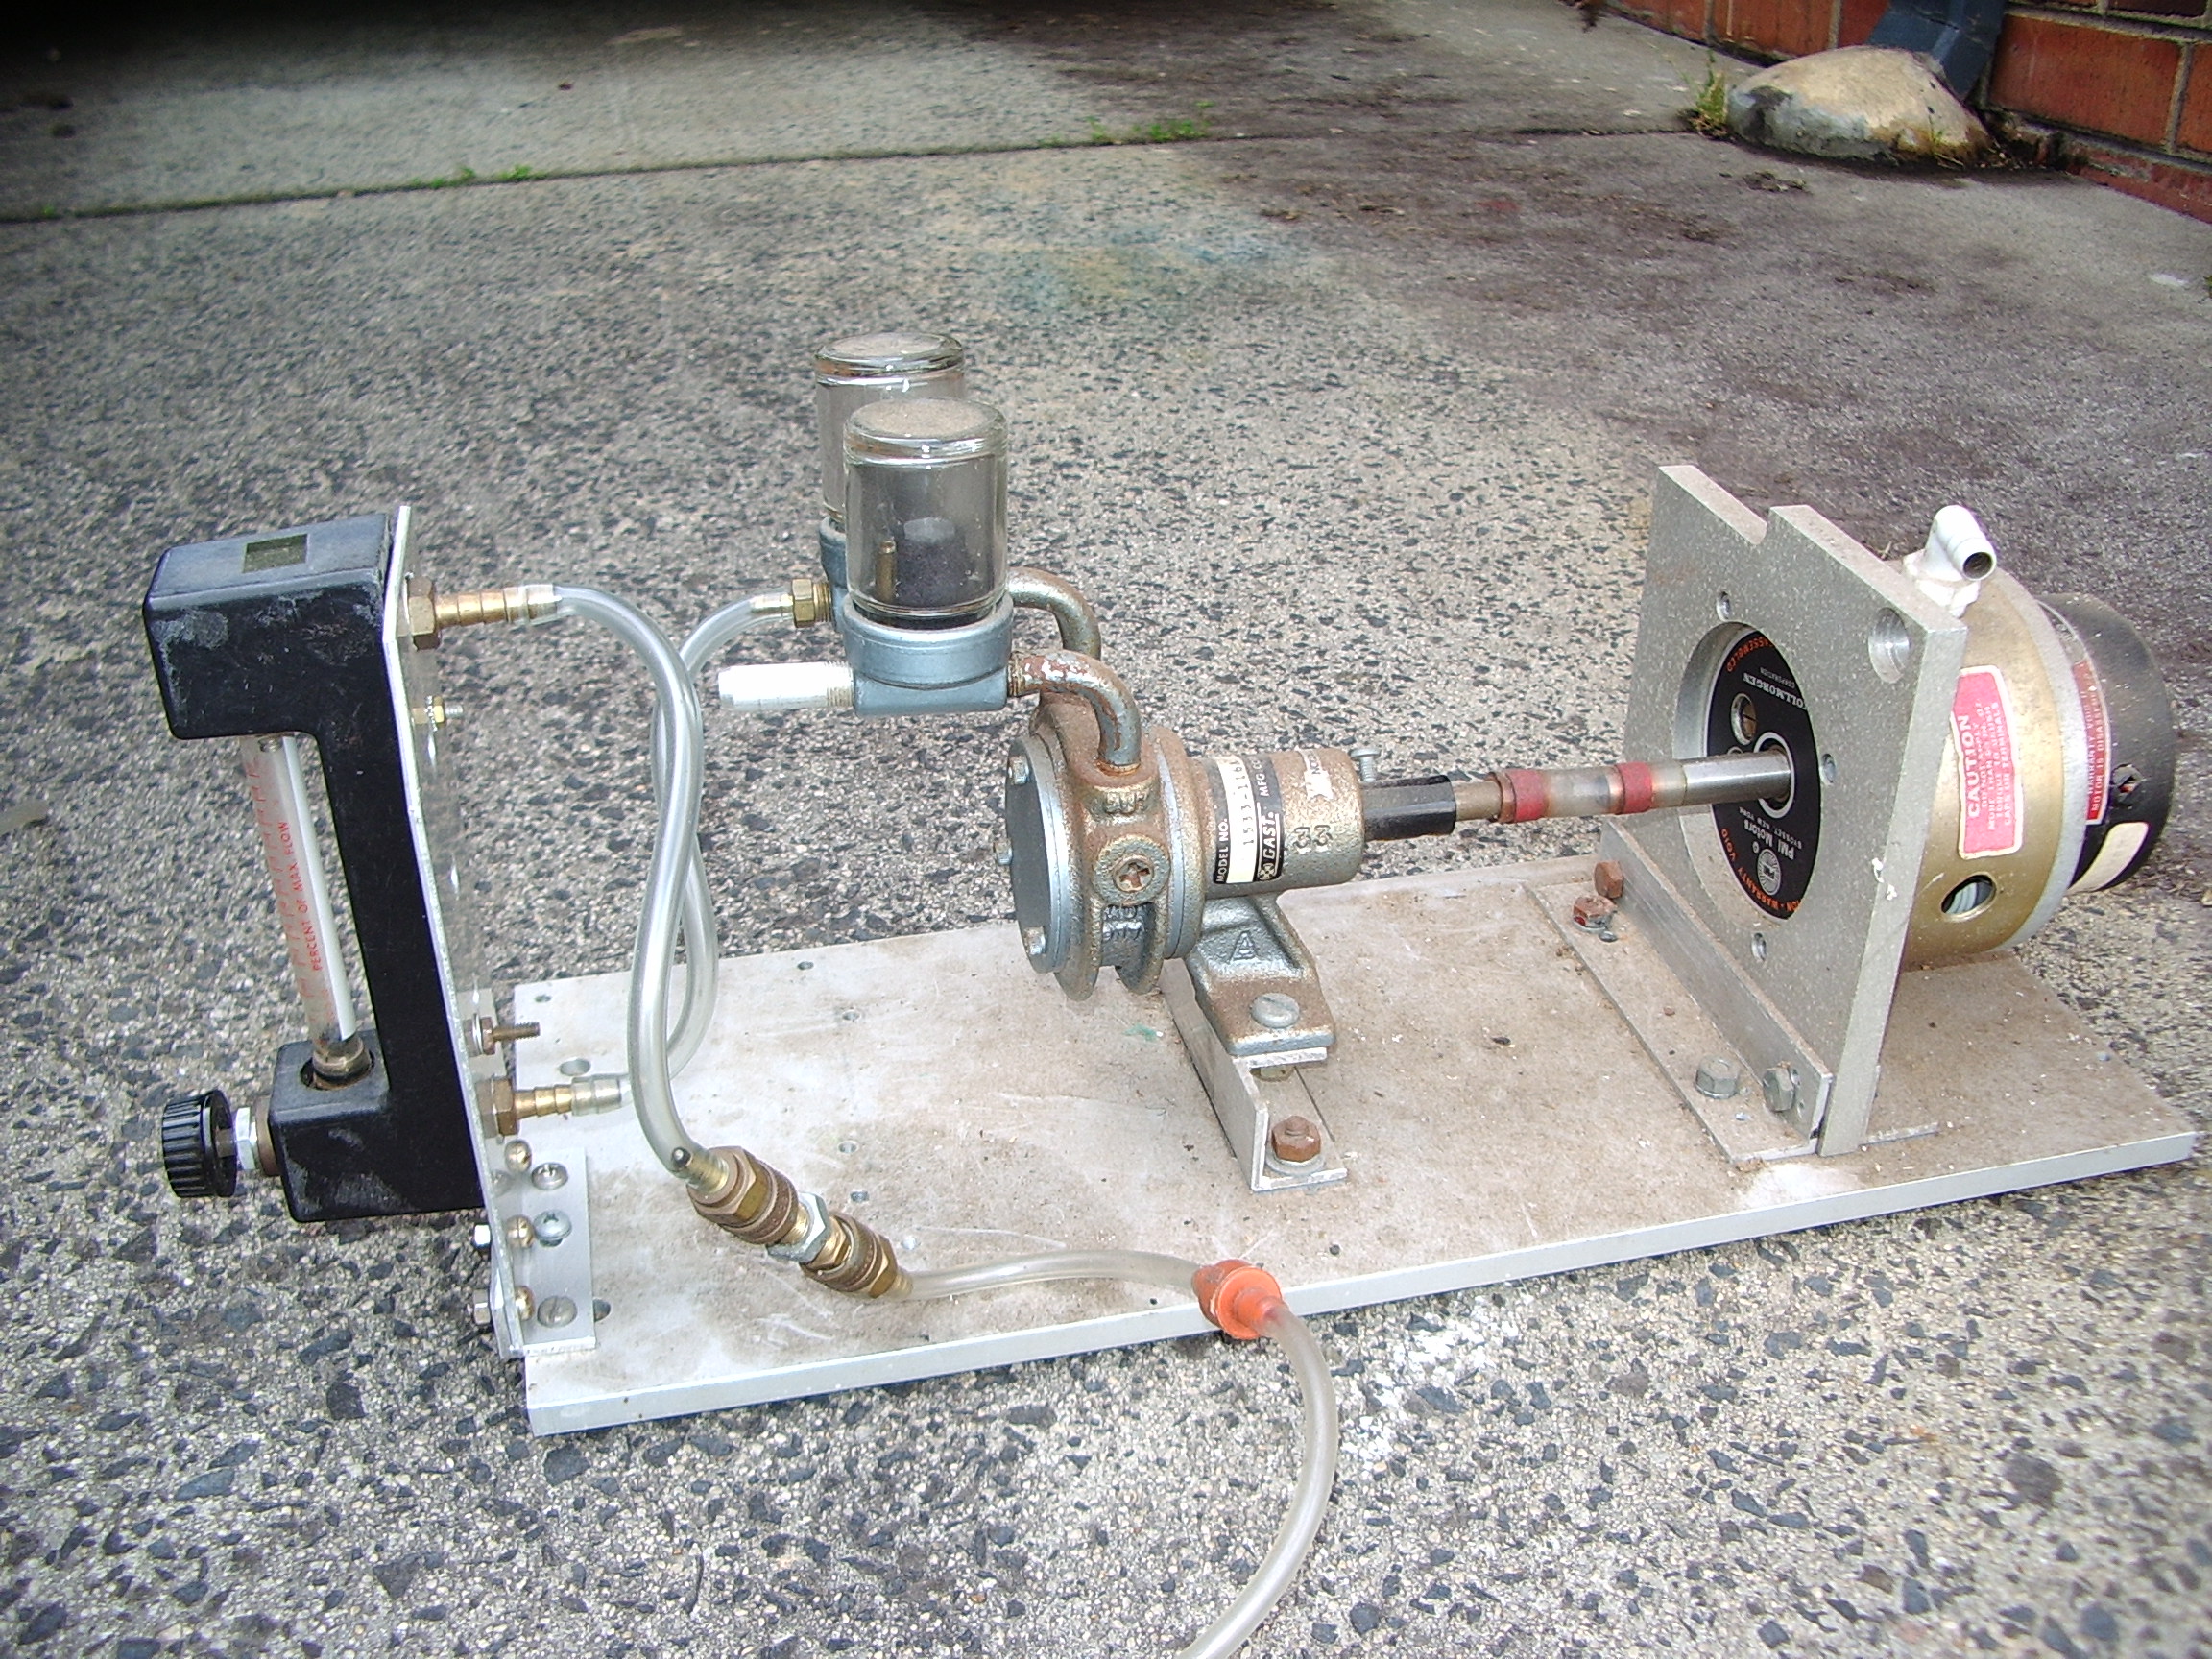
The
following images are my etching tank, constructed from glass sheets and
silicon sealant. If you choose to make a tank from glass like
this do use the so called acid cure external guttering grade
silicone rubber. I made the mistake , in this model , of
using a
white rubber, which is filled with pigment, probably alumina. The
pigment reacts with the acid. The air plumbing is standard
garden
drip feed tubing. The air nozzles are made by crimping the end of the
tube shut by heating the tube and crimping with a heated pliers. Small
holes are drilled in the pipe.
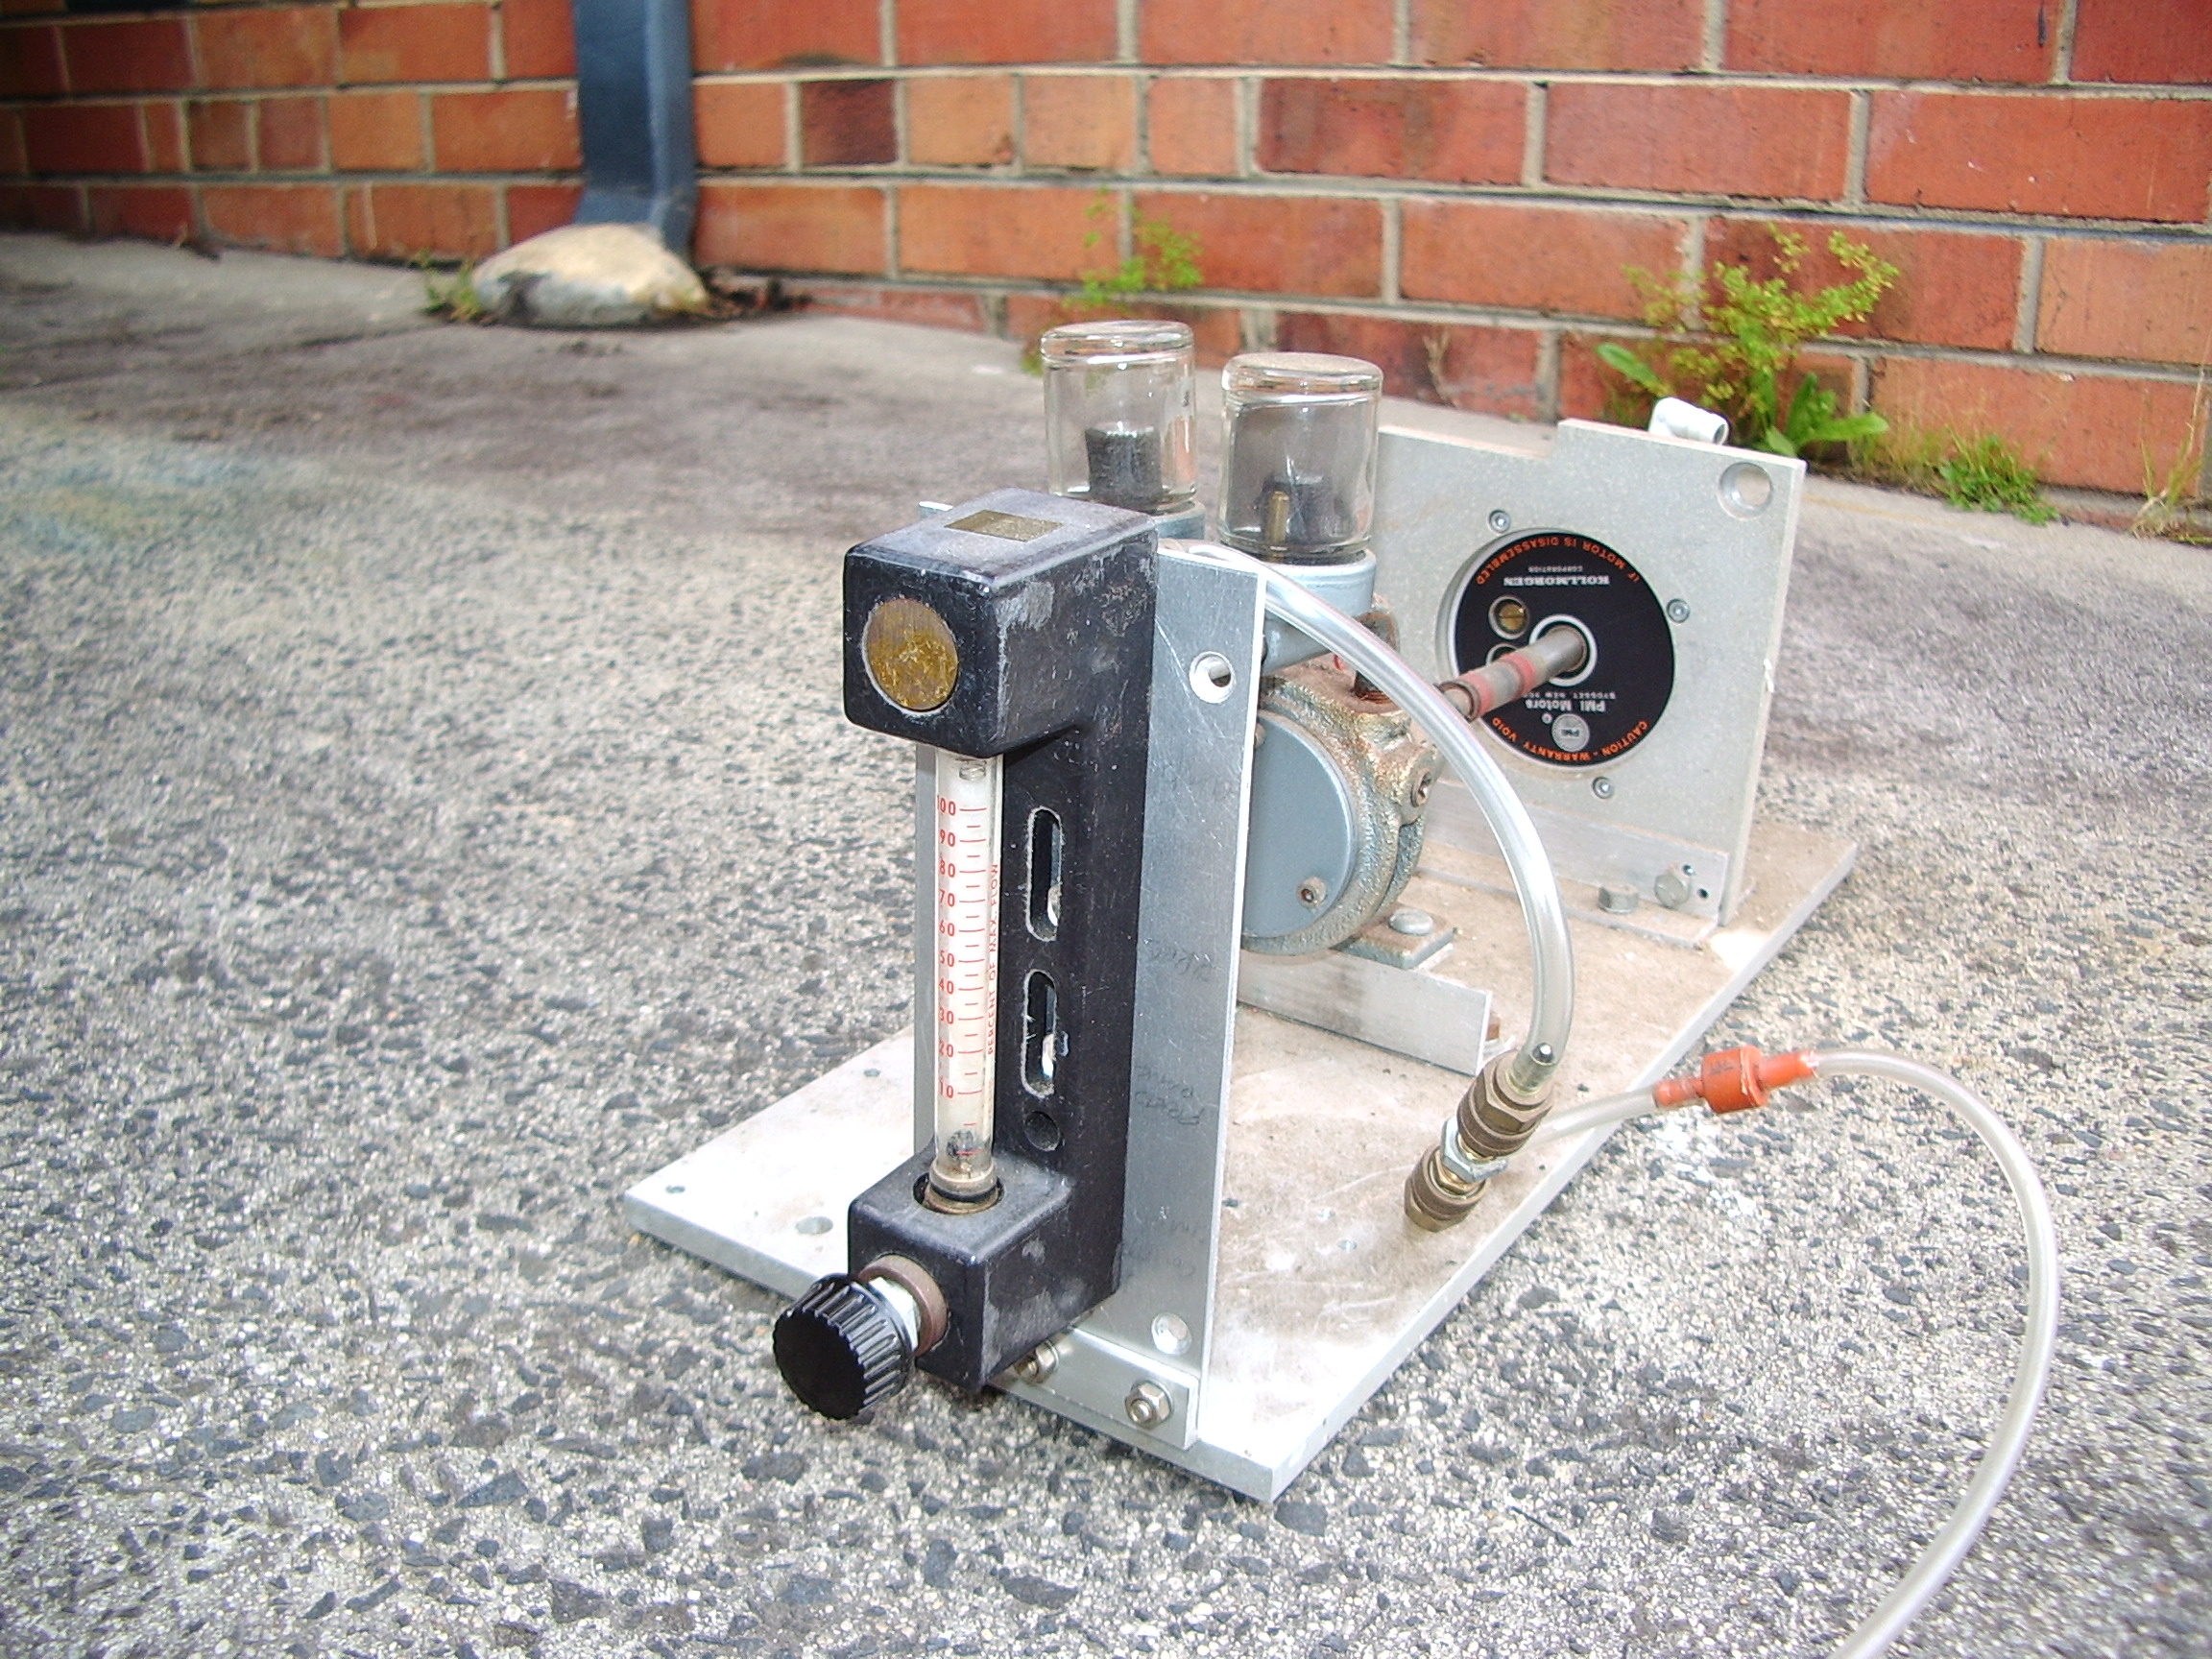
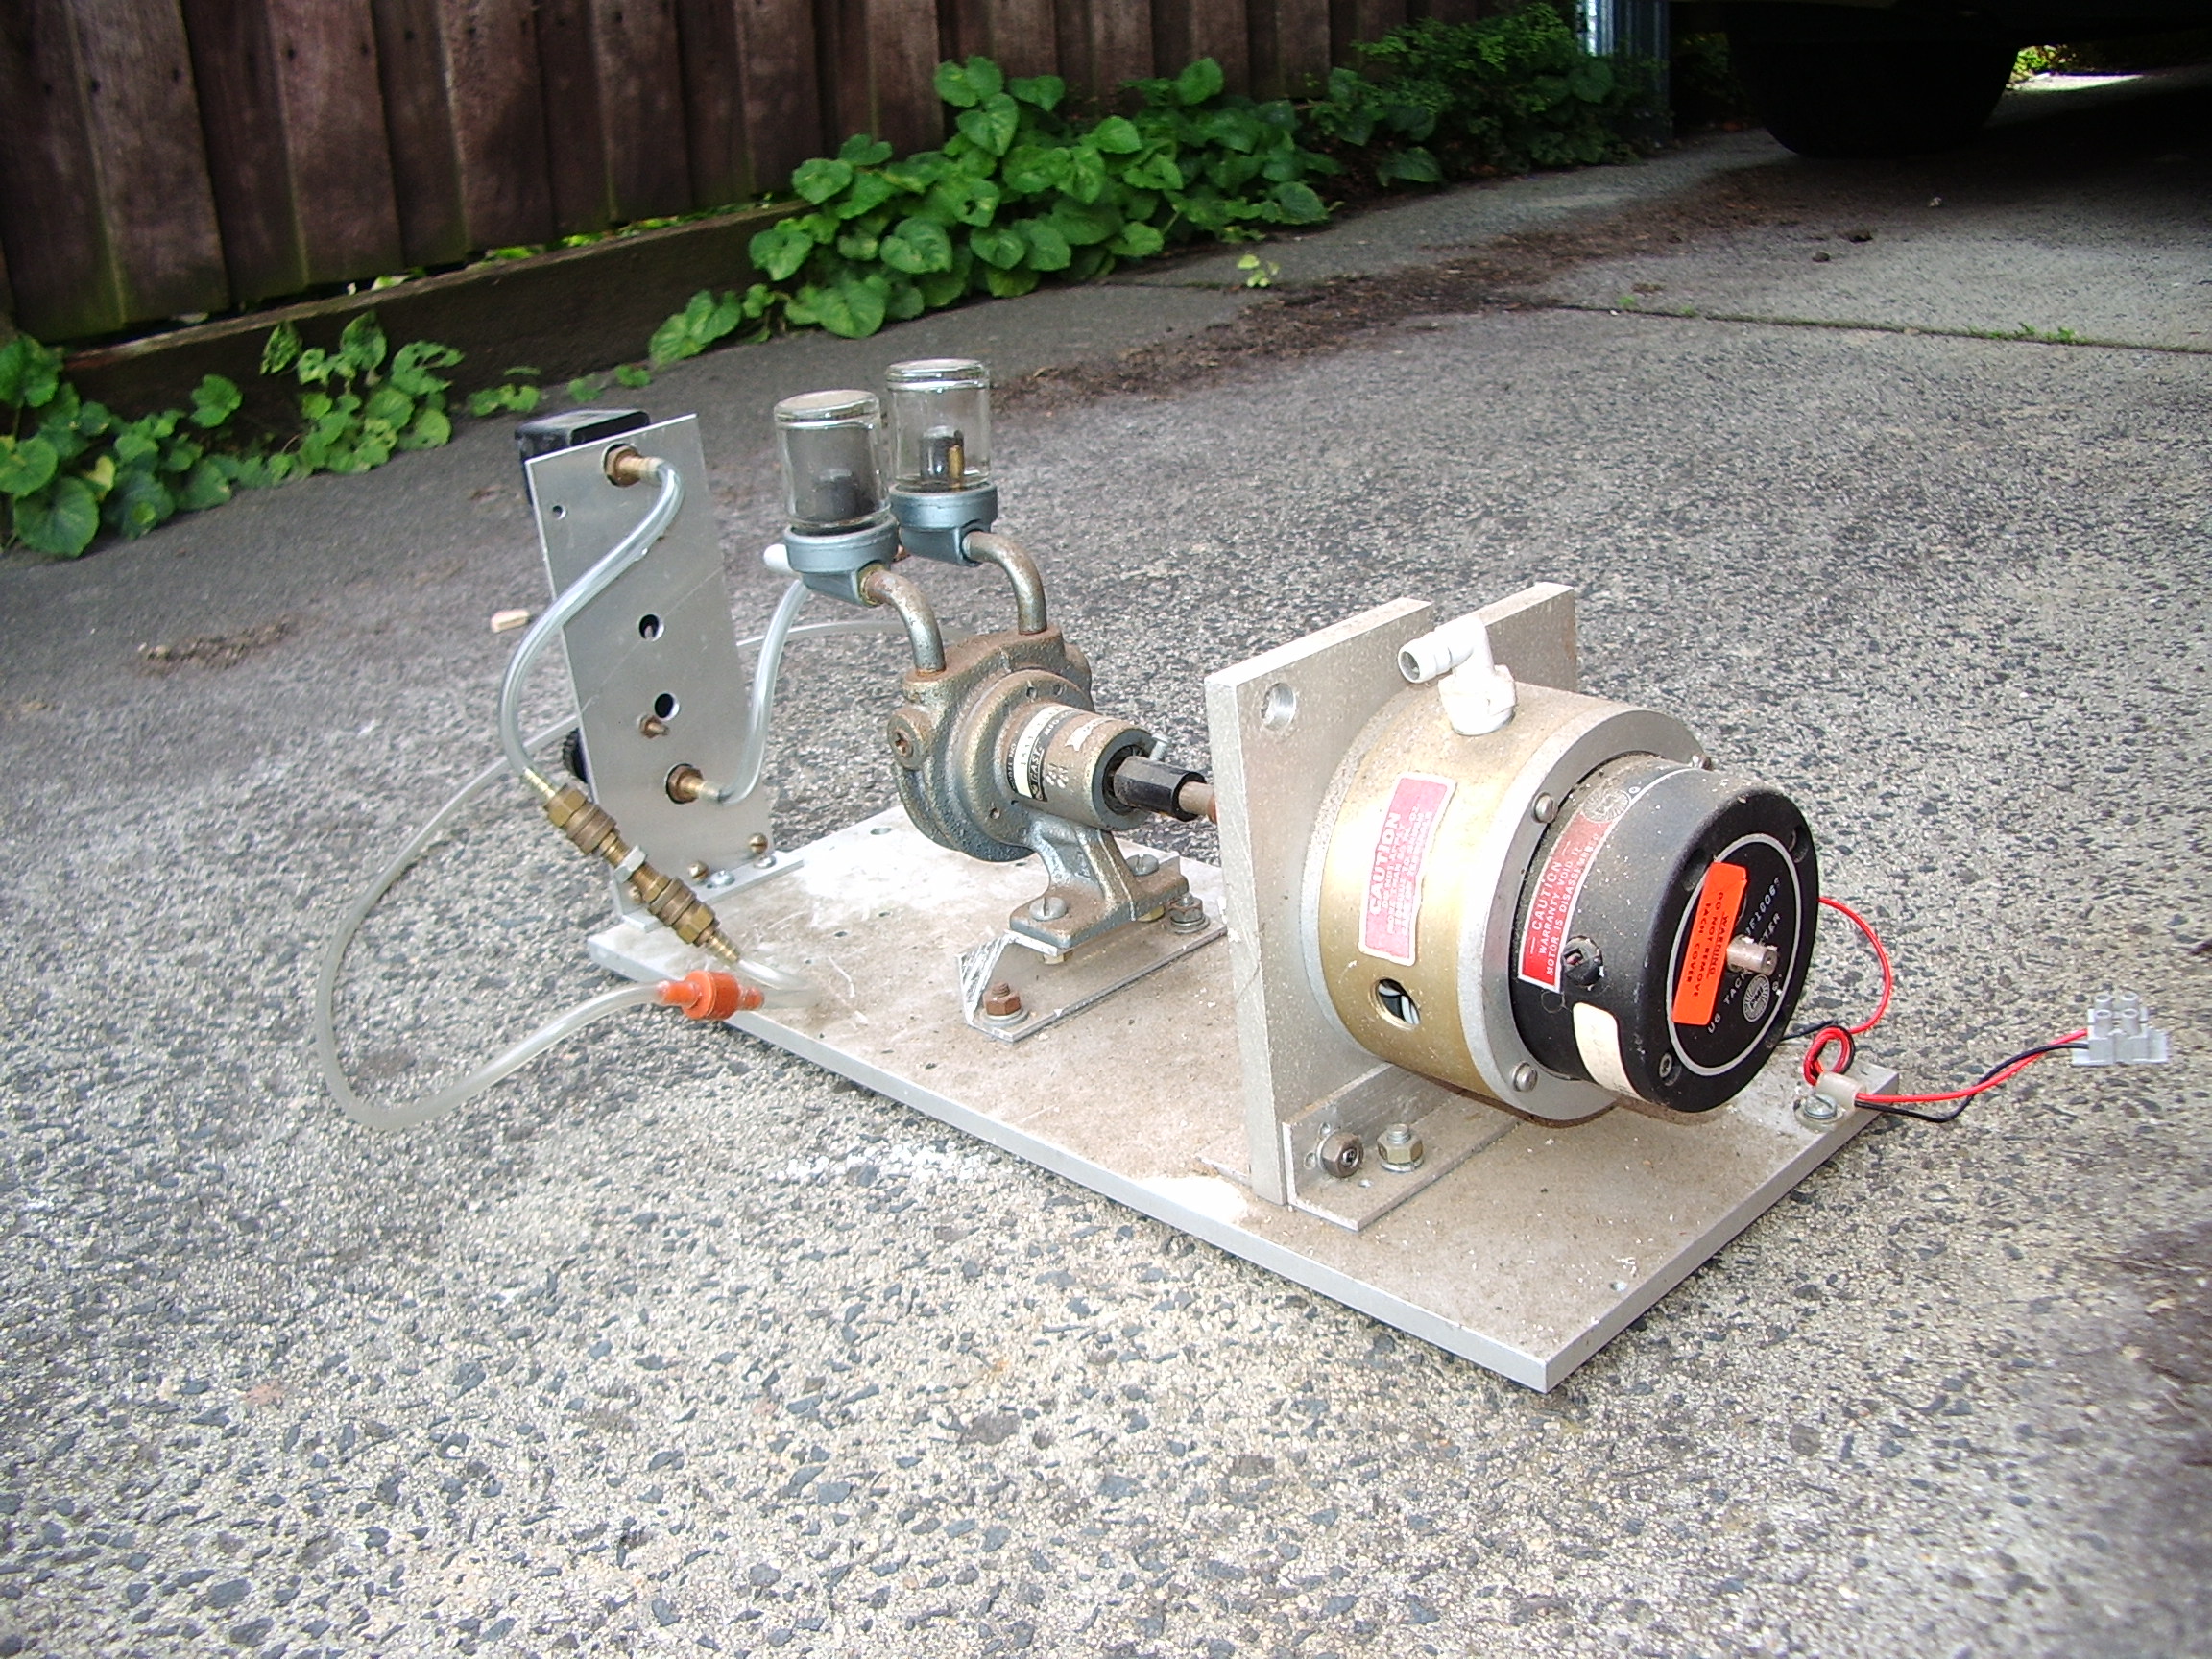
The
pump, motor and air flow indicator (rotameter) were all found in skips
at work. Aquarium pumps with some means of
regulating air
flow would be also satisfactory, cheap and readily available. You cant
have too much air flow. If the air causes etchant to be expelled
then you have too much! The air plumbing also includes a one
way
non return valve. This is to prevent any possibility of backflow by
siphon action of etchant back into the pump. It also prevents corrosive
vapours from finding their way into the pump. To be
absolutely
sure of preventing siphon action backflowing into the pump, allways
mount the pump higher than the etchant tank.
A note on the storage of this etching solution.
Aerated
, acidified ferric chloride solution is actually quite a powerfull
oxidising agent. It must be, after all, it can oxidise metallic copper.
It can even oxidise polyethylene. I discovered this the hard way when I
had drained my etching tank of fluid to safely store it away, as I do
not want animals or children to access the tank contents. After a
couple of years of neglect, the polythene bottle had completely
corroded at the liquid-air interface. The plastic had
become extremely brittle and a slow leak was evident. PET
bottles seem to be more resistant to this oxidation, but now I
change the bottle every year. Glass bottles are best, off course,
but it is hard to find one with a lid that will not disintegrate or
irreversibly bind.
For those that must know, the motor is a 50 volt dc servo motor and the
vane pump come from a long dead Burroughs 9 track tape drive. There is
a one way check valve to prevent backflow and reverse siphoning. The
check valve can be sourced from auto wreckers and (my guess) aquarium
suppliers.
homepage
email sig, links Fri Feb 26 13:31:17 EST 2010;Fri Oct 1 18:38:22 EST 2010