Some hand made furniture of mine
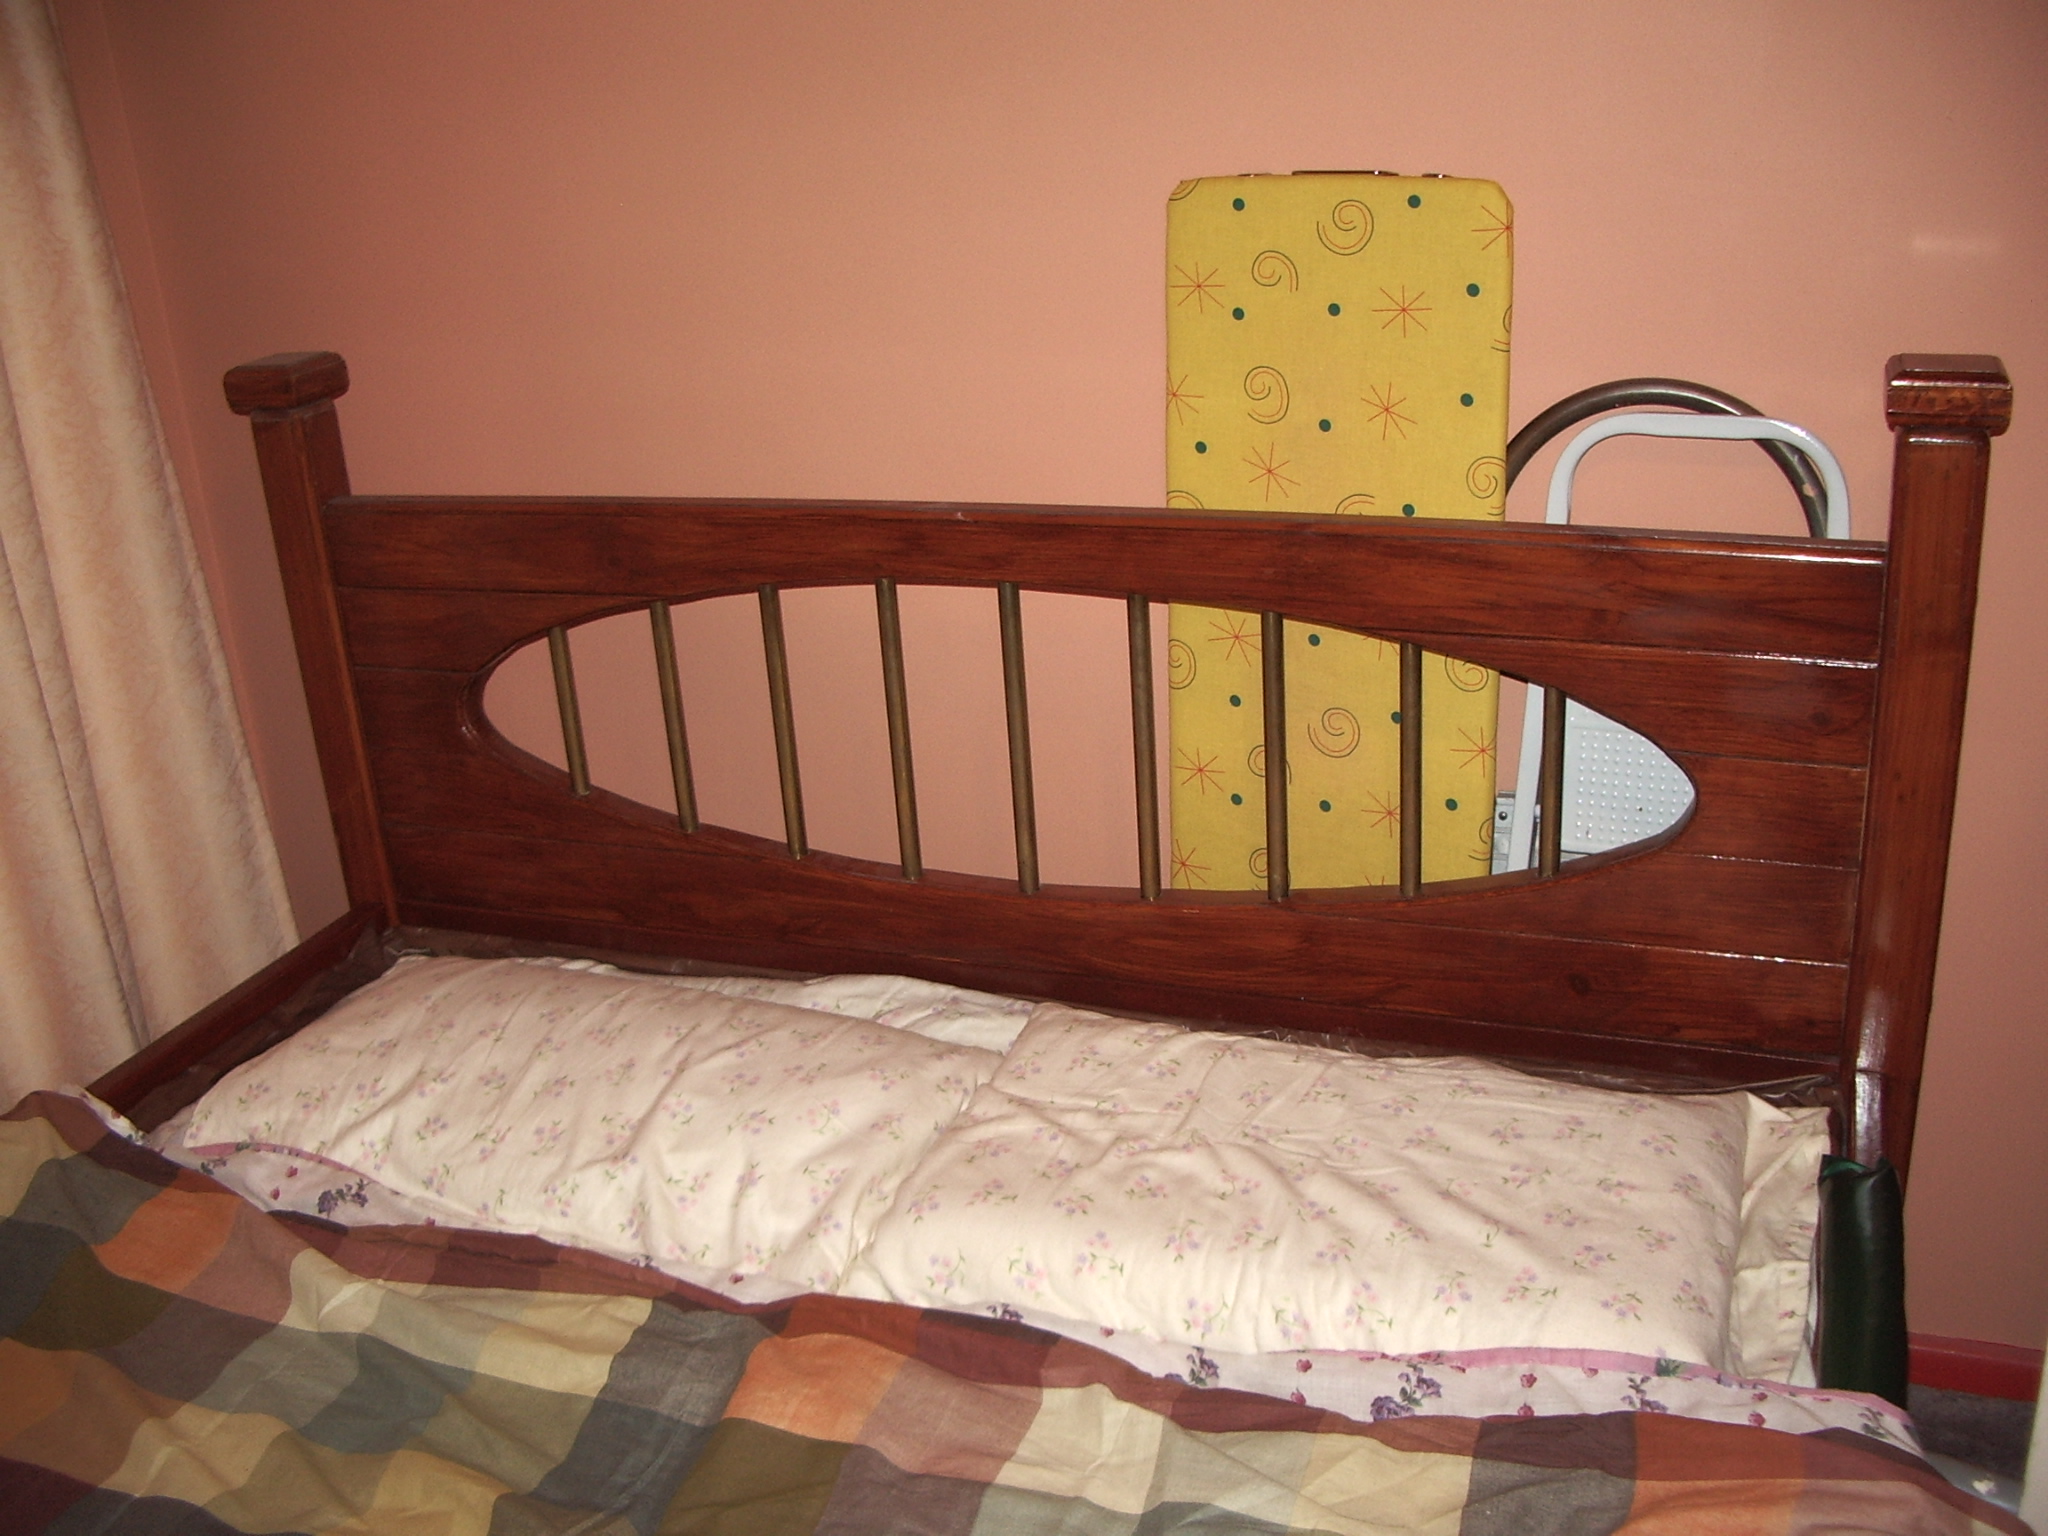
The Bed Head
The Bed Head
designed and constructed by the author in 1986
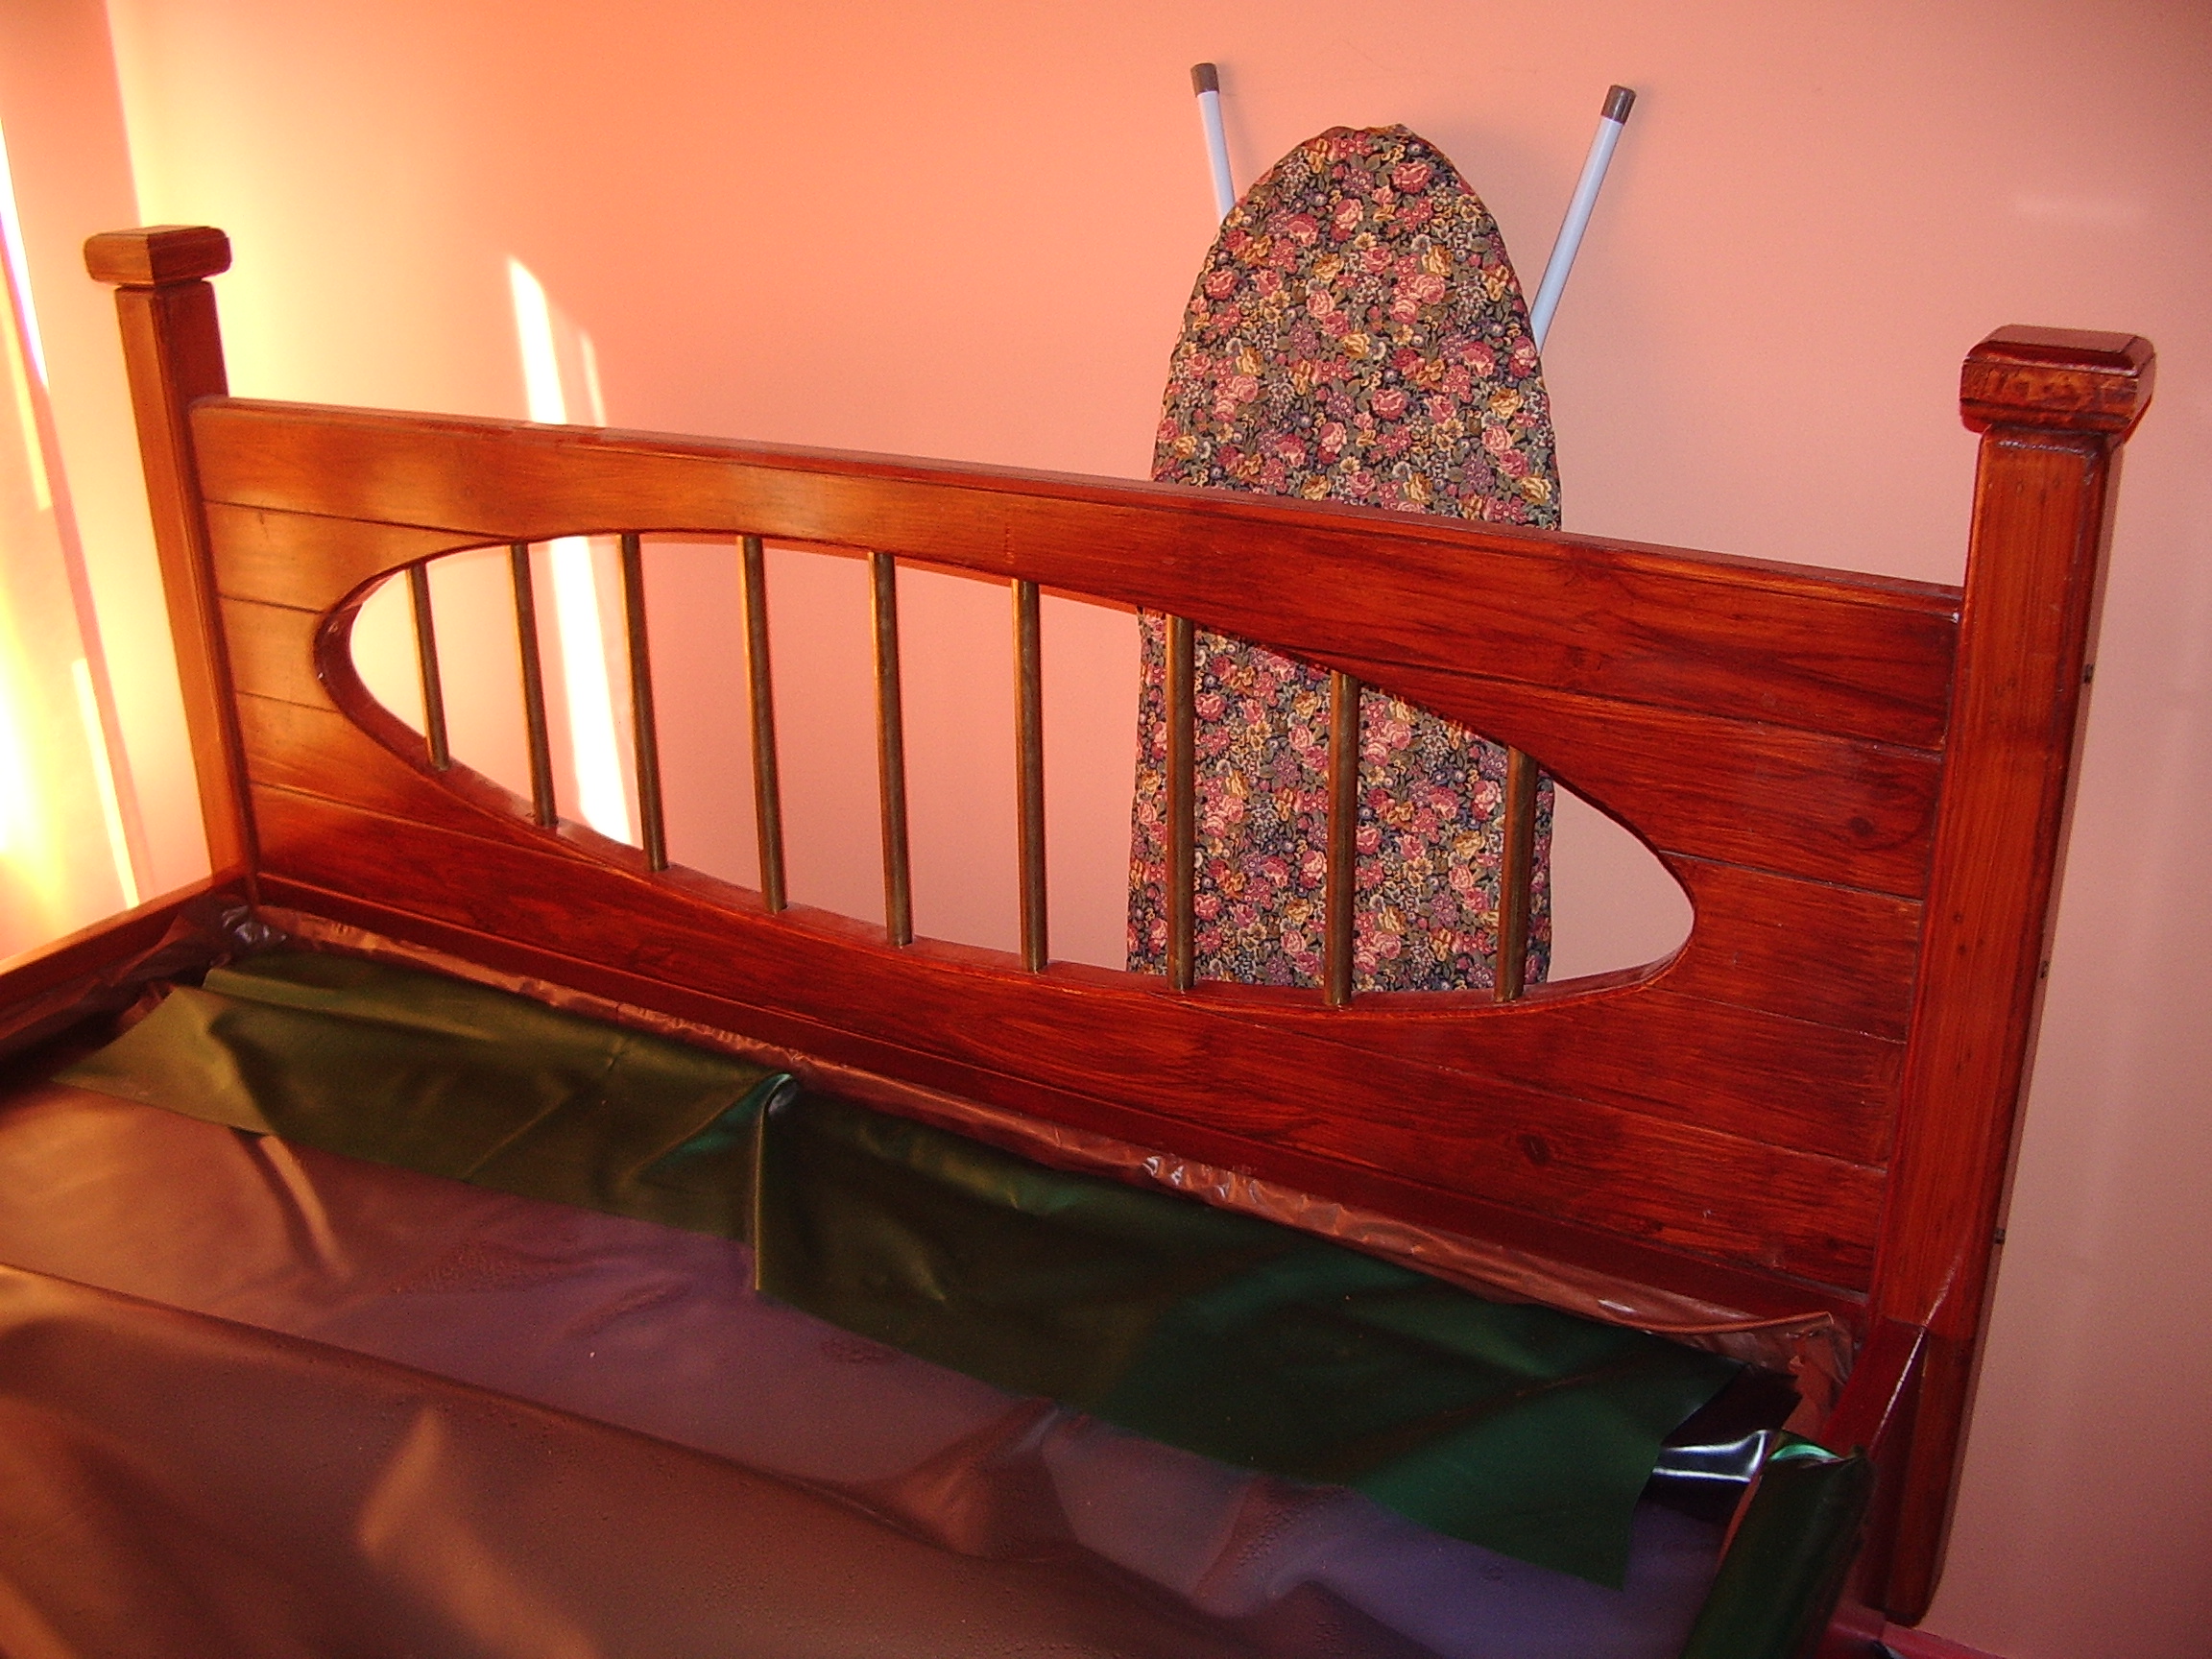
abstract: Bed head made for another cheap water-bed knock-together frame. classical design with brass tubing decoration, and ornamentation.
author: Ralph Klimek 2007
artisan: Ralph Klimek
copyright: none claimed, copyleft you are free to do with this design as you see fit.
This project was the very first attempt at a furniture grade project after purchasing a Triton Work Centre. Included in the cost of the project was a 1/4 inch router and a spoke-shave.
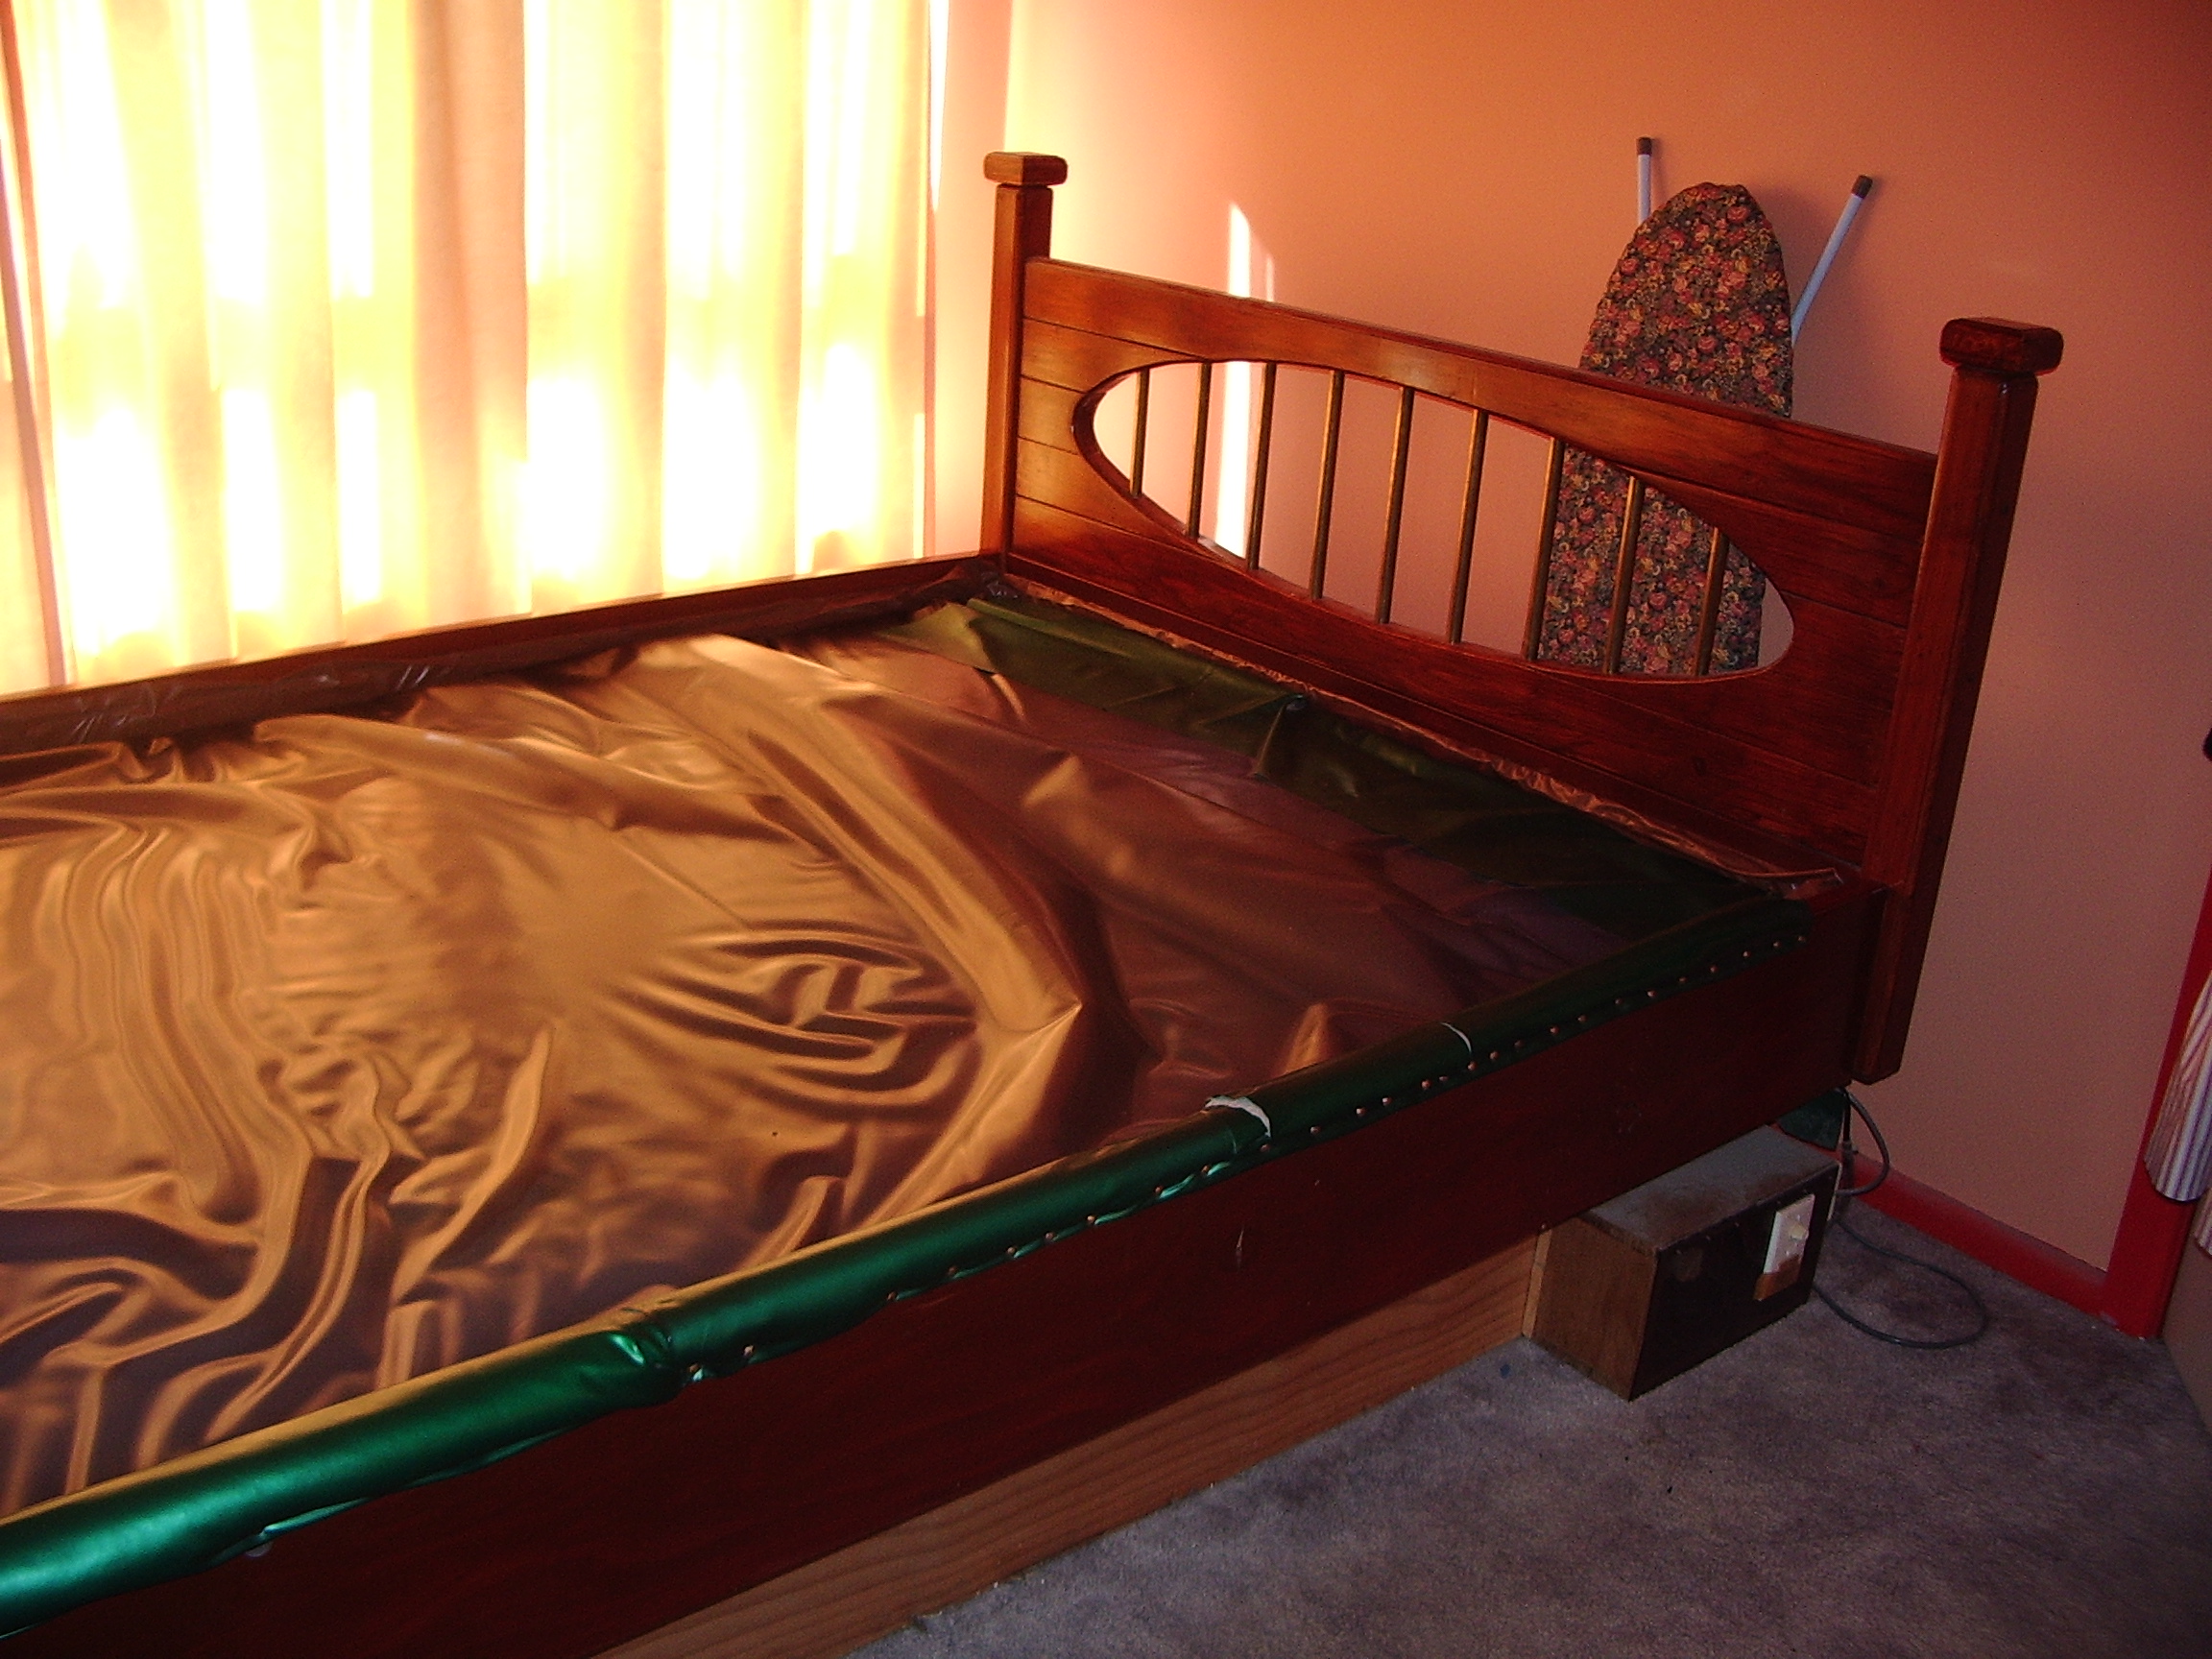
The bed head was designed to fit a do it yourself waterbed kit that came with the mattress and base but no head piece. The Boss determined that for appearance sake and fact that during the night one's pillow would be spontaneously ejected, a bed head would be required. Preconstructed bed heads were available as seperate items from larger furniture retailers at high cost, and visually appealling designs were very costly and would have required extensive modification in order to be fitted to the mattress frame. It was decided that I would construct one . I agreed to this, and then wondered how to proceed. The original specification called for a brazed polished brass frame. A check of metal suppliers' catalogues prices soon despatched that idea. Brass tubing is hideously expensive and an elaborate design would have required a huge amount of money. Any how, I didnt know how to weld brass and did not have the gas brazing equipment. So wood it would be.
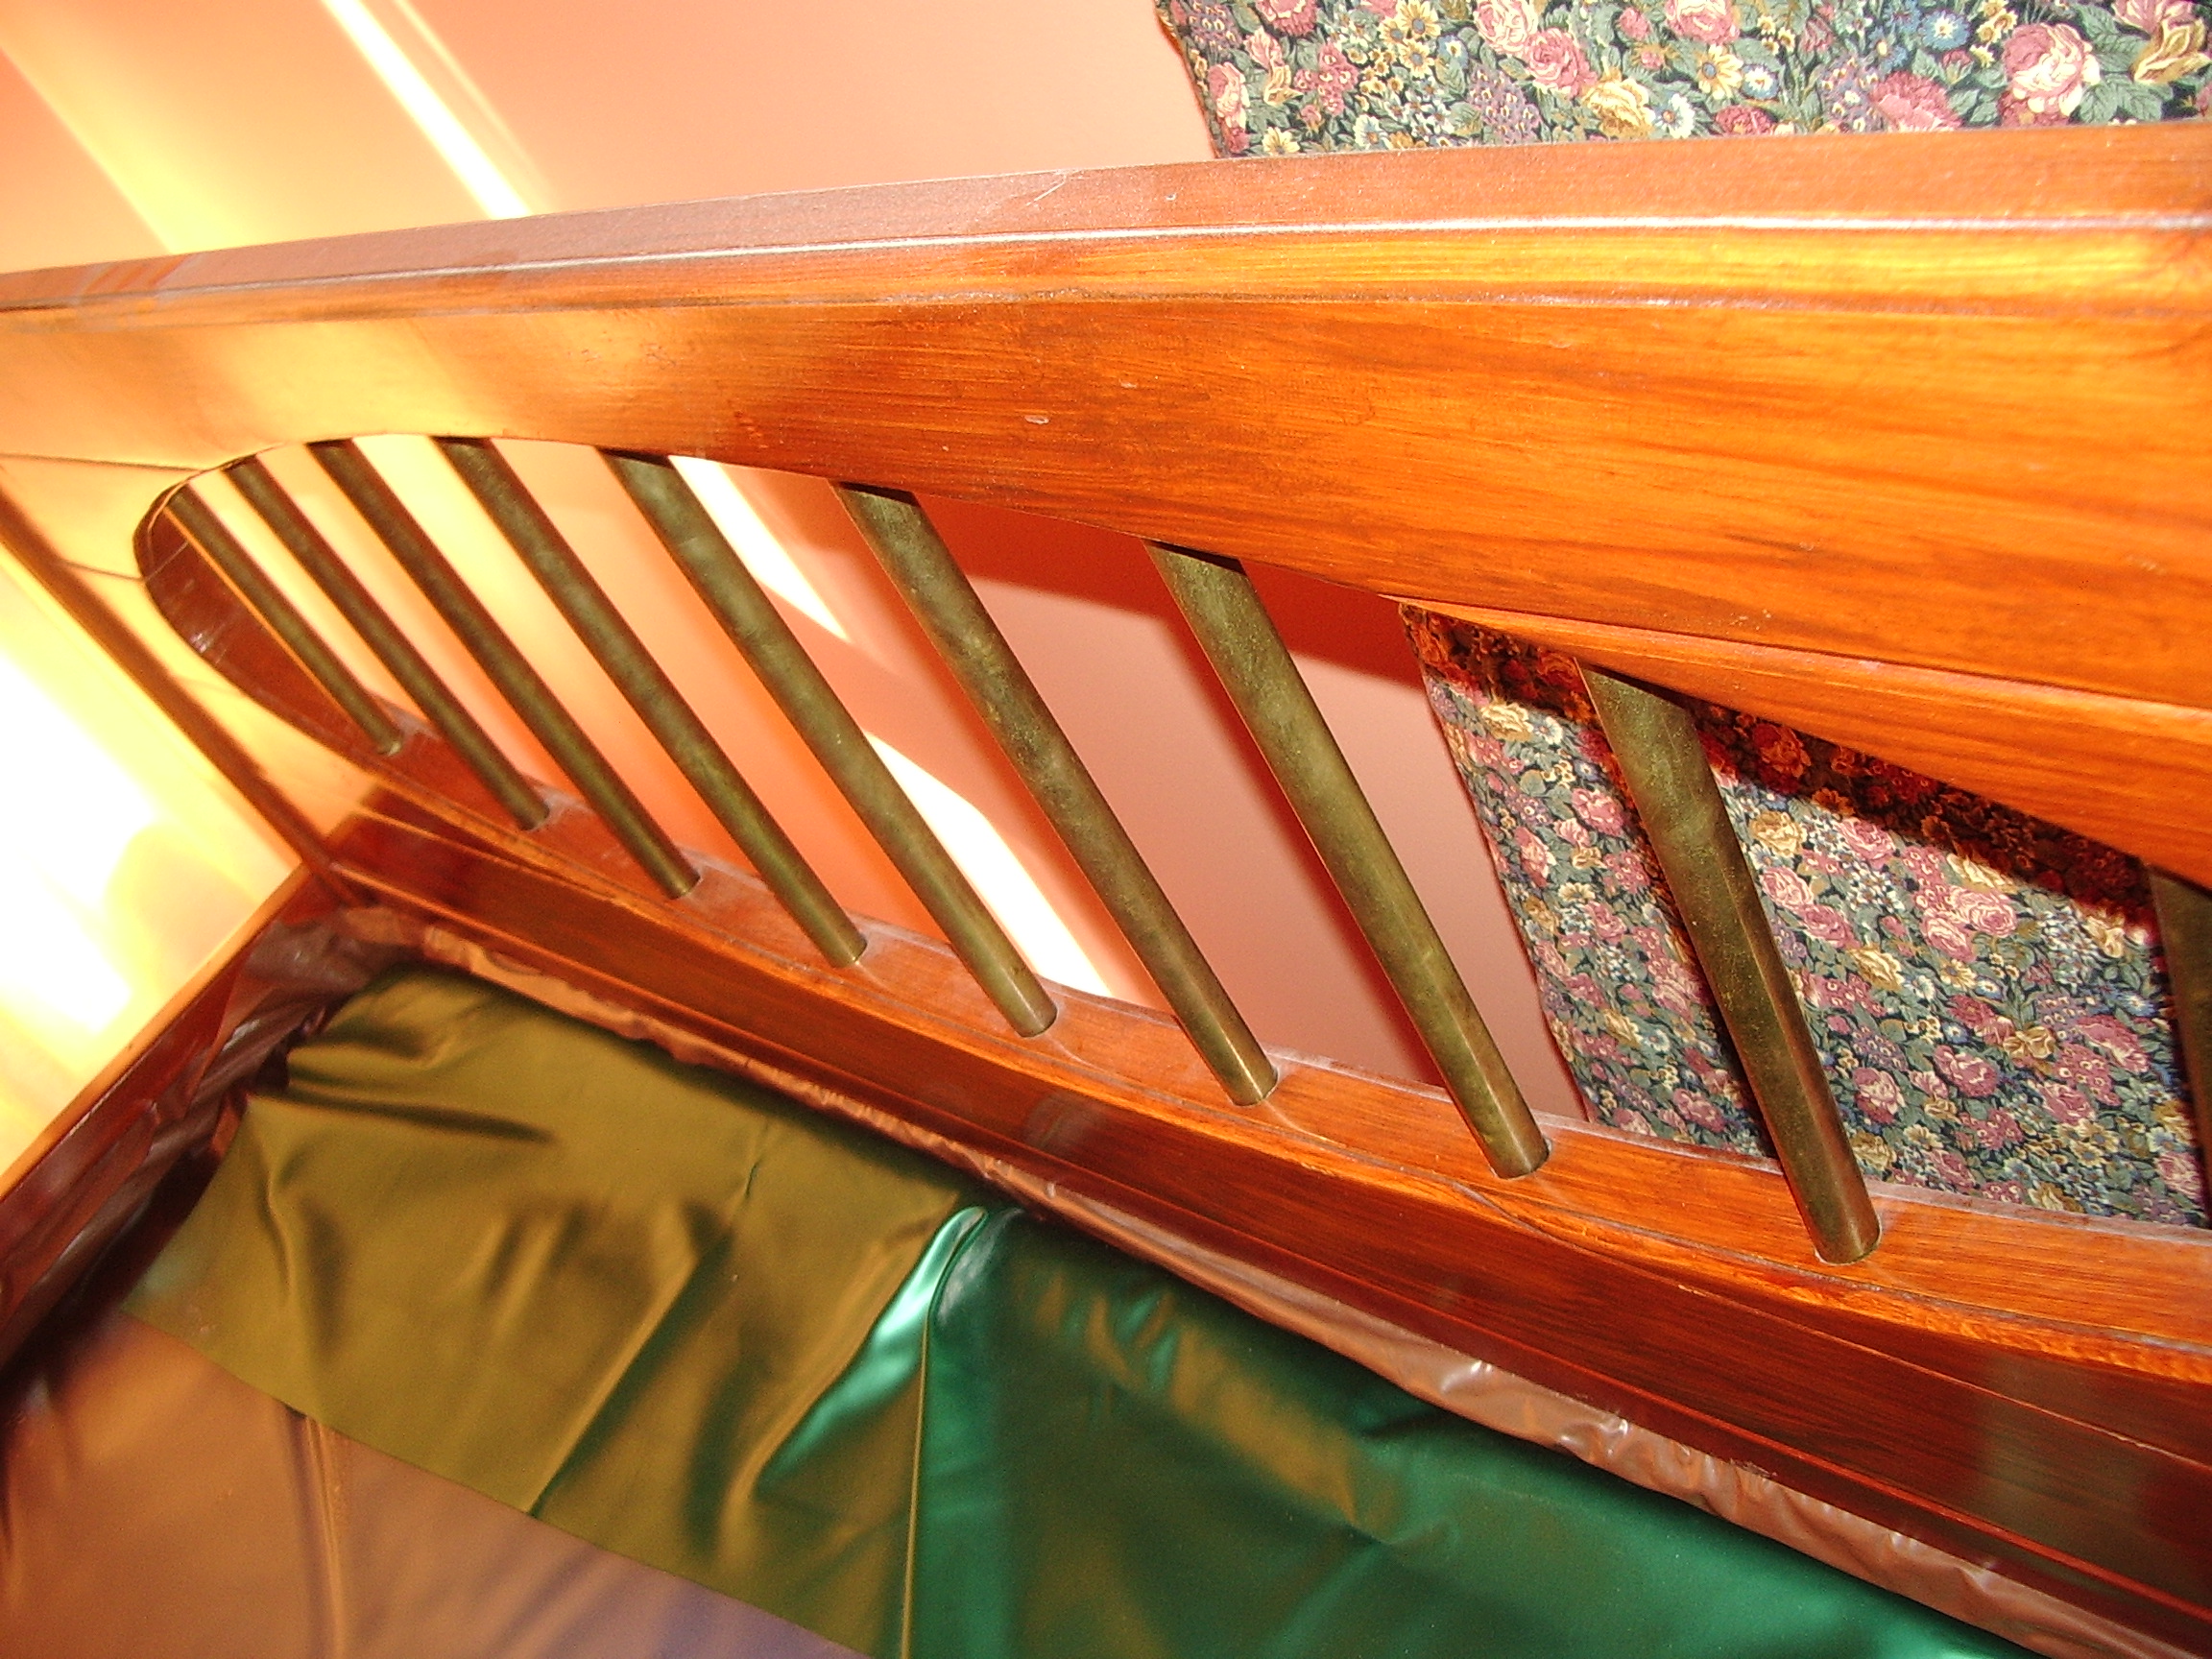
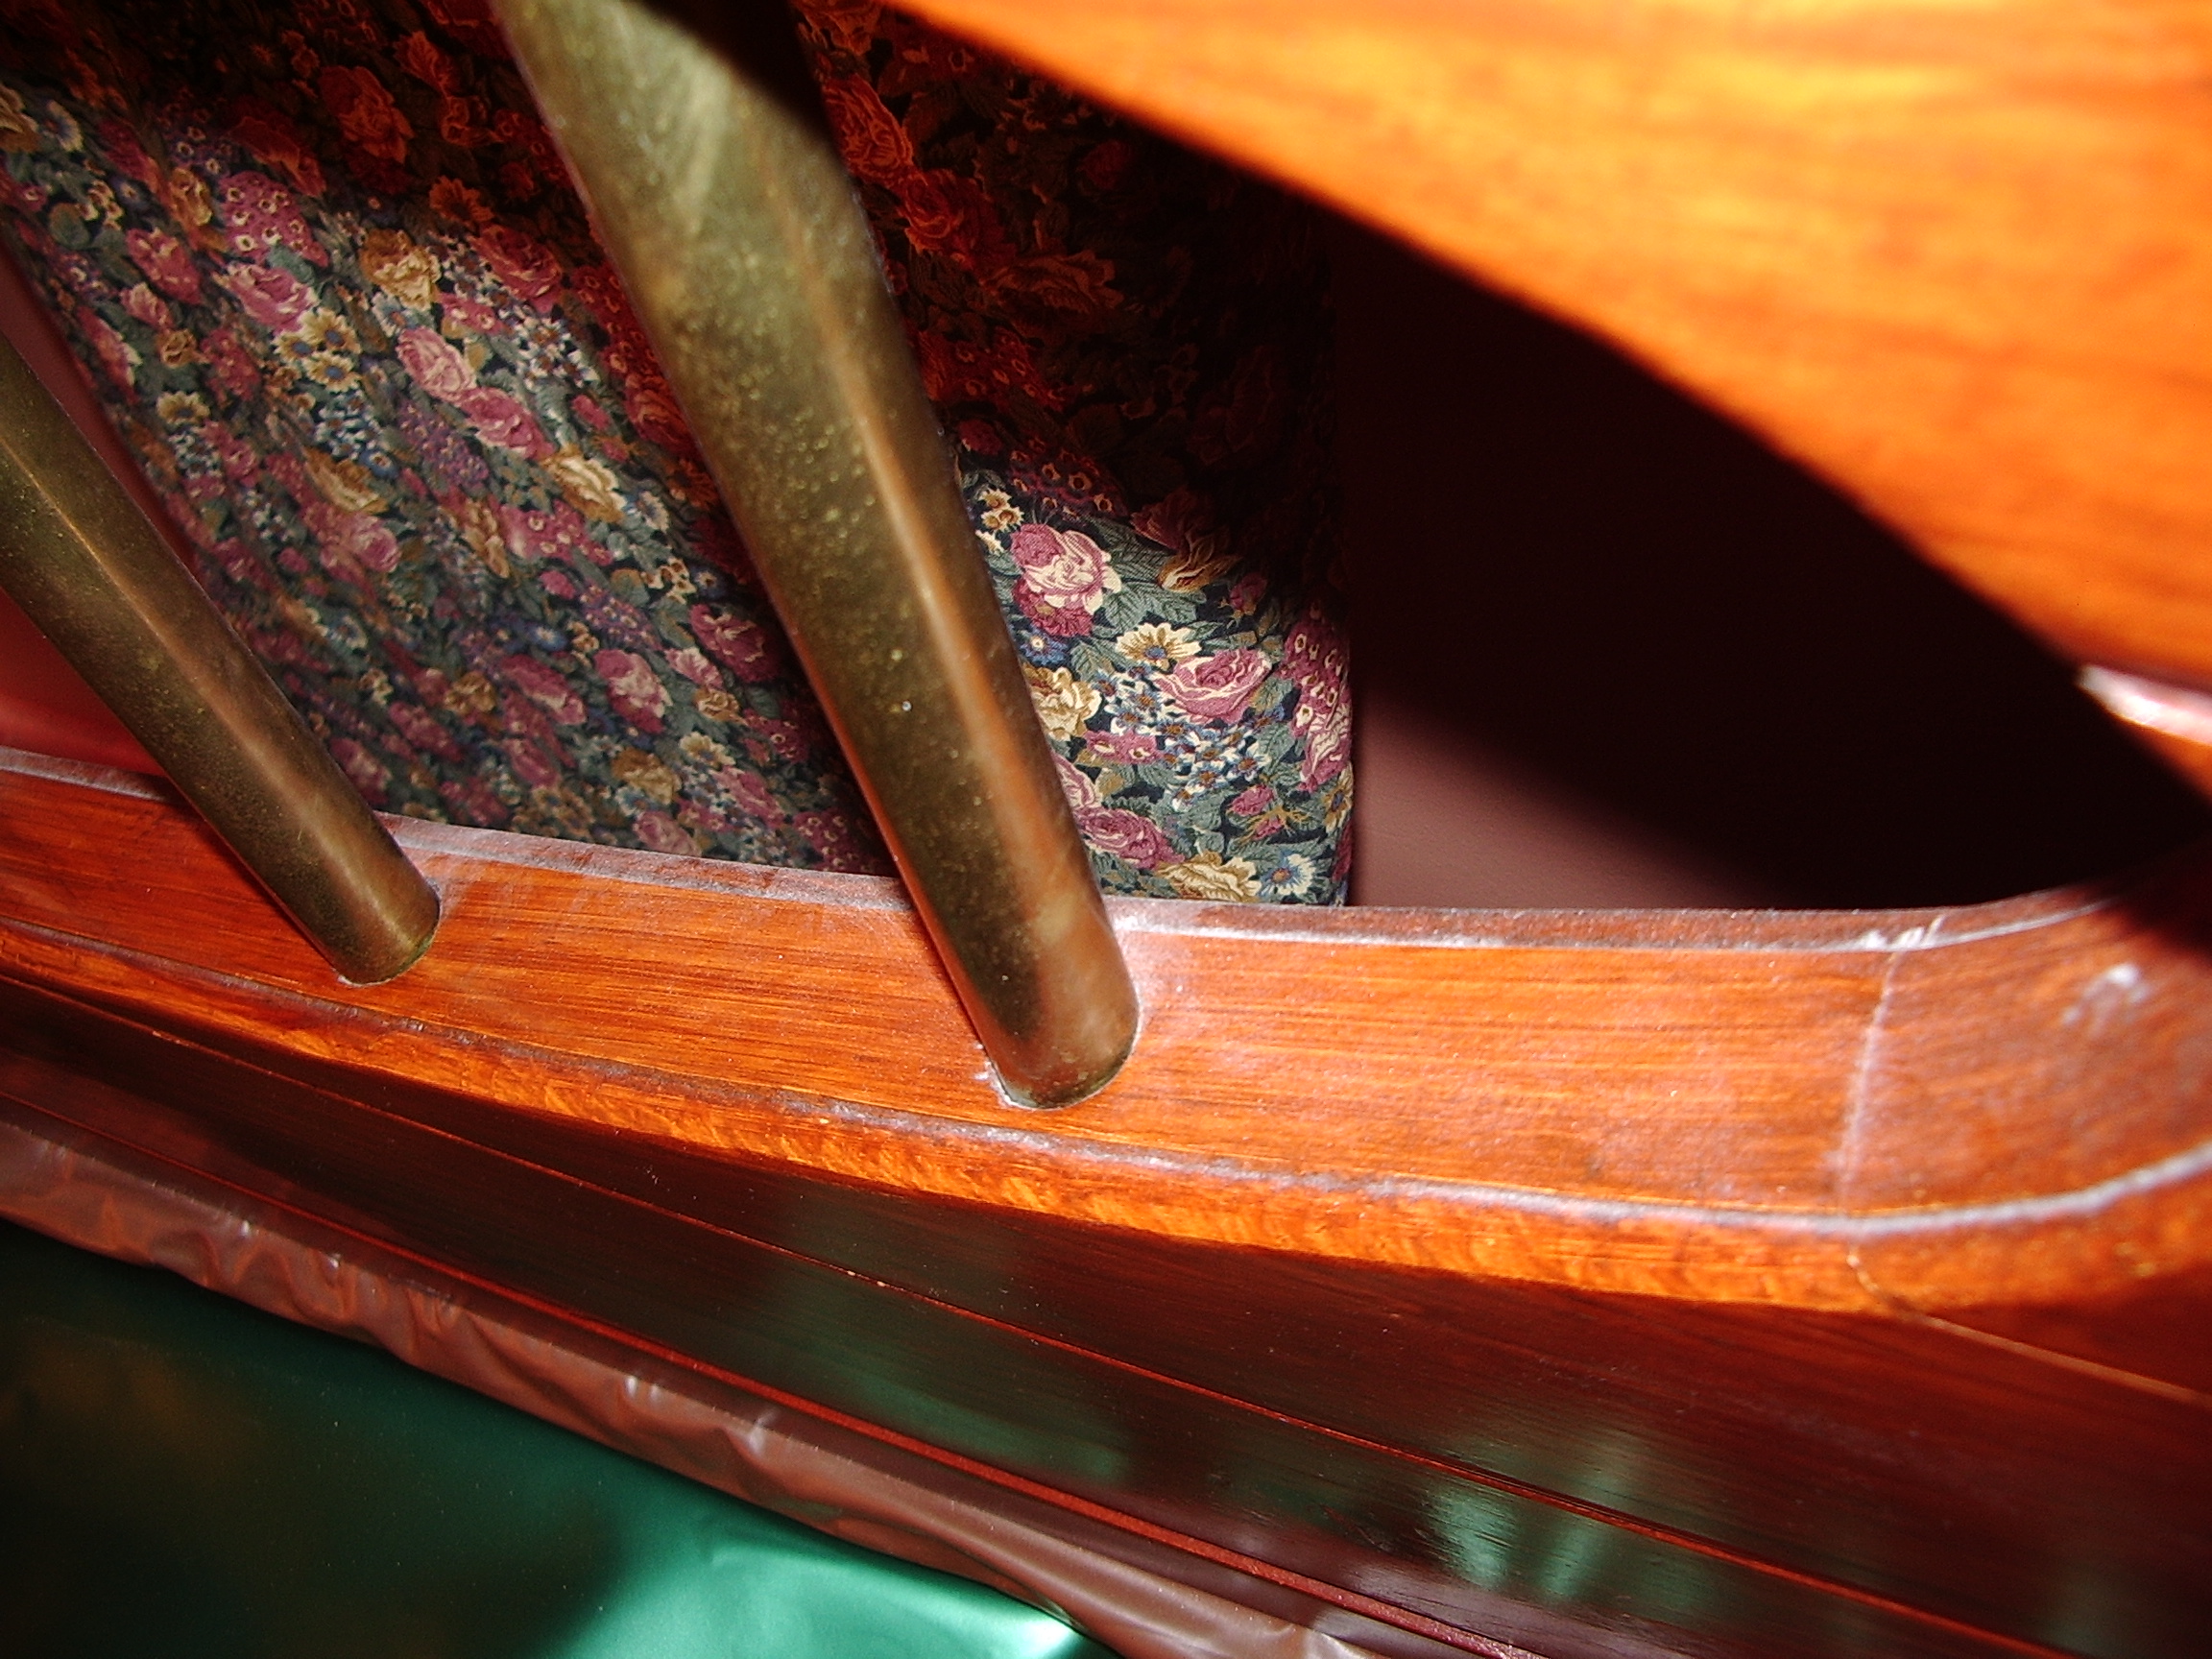
There was brass in the original design, I used polished brass towel rail for the vertical bars, and when freshly polished looks very handsome. The material is heavy pine boards, the side posts came from a pile of mystery wood kindly donated by our land lord. For this kind of project that is expected to have a long service life, use solid brass. Do not use the horrible brass plated steel. The minute this material is scratched or abused the brass will peel off exposing the raw iron. The copper in the brass is a more noble metal than steel and electrochemical corrosion will set in immediately and ruin your work.
The horizontal pine boards are doweled and mortised into the side bars. The bed head is then attached with heavy long steel self tap bolts into the bed frame. The brass tubes sit in holes in the pine board and they are loose, but permanently trapped, during final assembly. The holes for the brass tubes were hand drilled before the ellipse was cut so that the ellipse edge would not be ruined by attempts to drill into a non flat and planar surface.
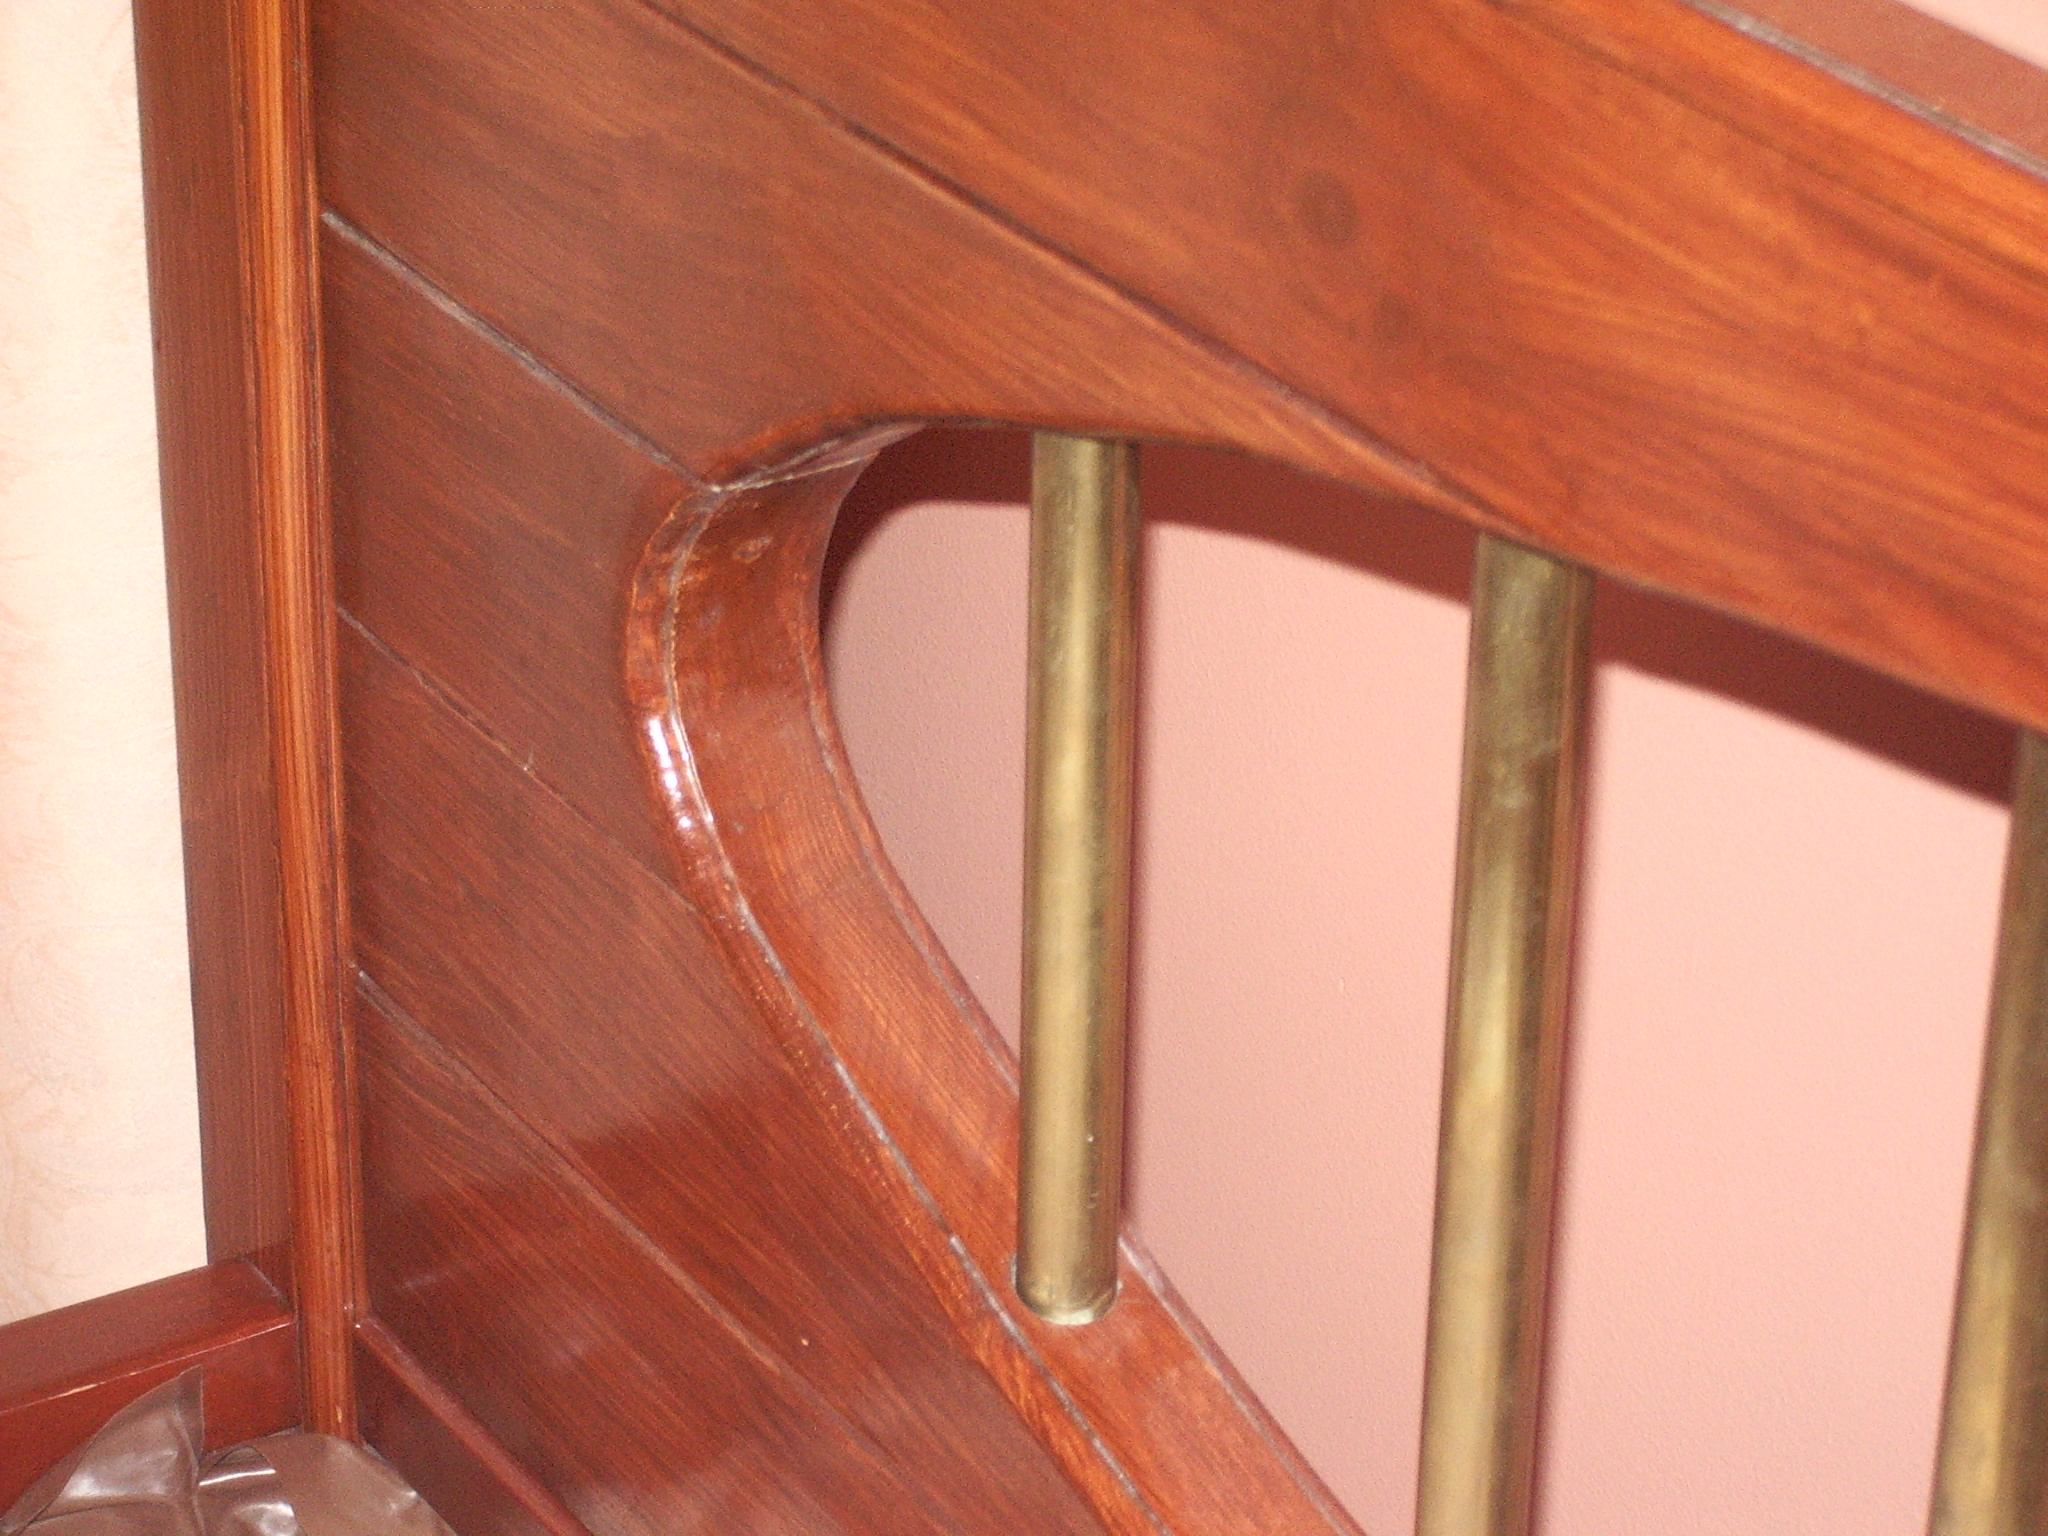
The elliptical opening was created by first forming a rough opening with board offcuts . The string and pencil method was used to draw an appropriately shaped ellipse, with some trial and error. A jig saw was used to shape the blocks. A trial assembly was then done using unglued dowels and sash cramps and the ellipse was fined up and finished off with a round spokeshave, this tool being the most expensive special purpose tool in the project. A spoke-shave is a plane for curved surfaces and it requires a well sharpened and maintained blade and a huge amount of strength and skill to get right. This skill I had to acquire by just doing the work! It is possible to cut this ellipse with a 1/2 inch router, however, unless you have a template of the right shape it is highly likely that you will have just one slip up with the router and your work will be spoiled. My little router was used to cut the decorative edges. Finish is sprayed polyurethane varnish which has not needed service in twenty years.
Things I should have done differently. The pine boards as purchased were so called dressed all round, with rounded over edges. The dressing was not very good so I improved it with a hand plane. This interacted badly with the machine rounding over. It was my original intention to have a continuous flat planar surface and had tediously hand planned it to try to make it so. Without a power plane which I did not possess at this juncture, I could not remove sufficient material by hand. The result is that at close inspection, the board joints do not look good. I should have just admitted defeat and used a 1/4 rounding over bit and disguised the joint line as decorative edges. This would have resulted in an ugly junction where it would have met up with the elliptical edge and I still dont know what I should have done. The side bars could have done with some more decorative routed lines with a core box bit.
Overall, time and polite opinion have rated this project a success. Sadly it is destined to landfill as I feel that we have outgrown the waterbed era but it has served for twenty years and is one of the longest enduring projects of mine.
 | 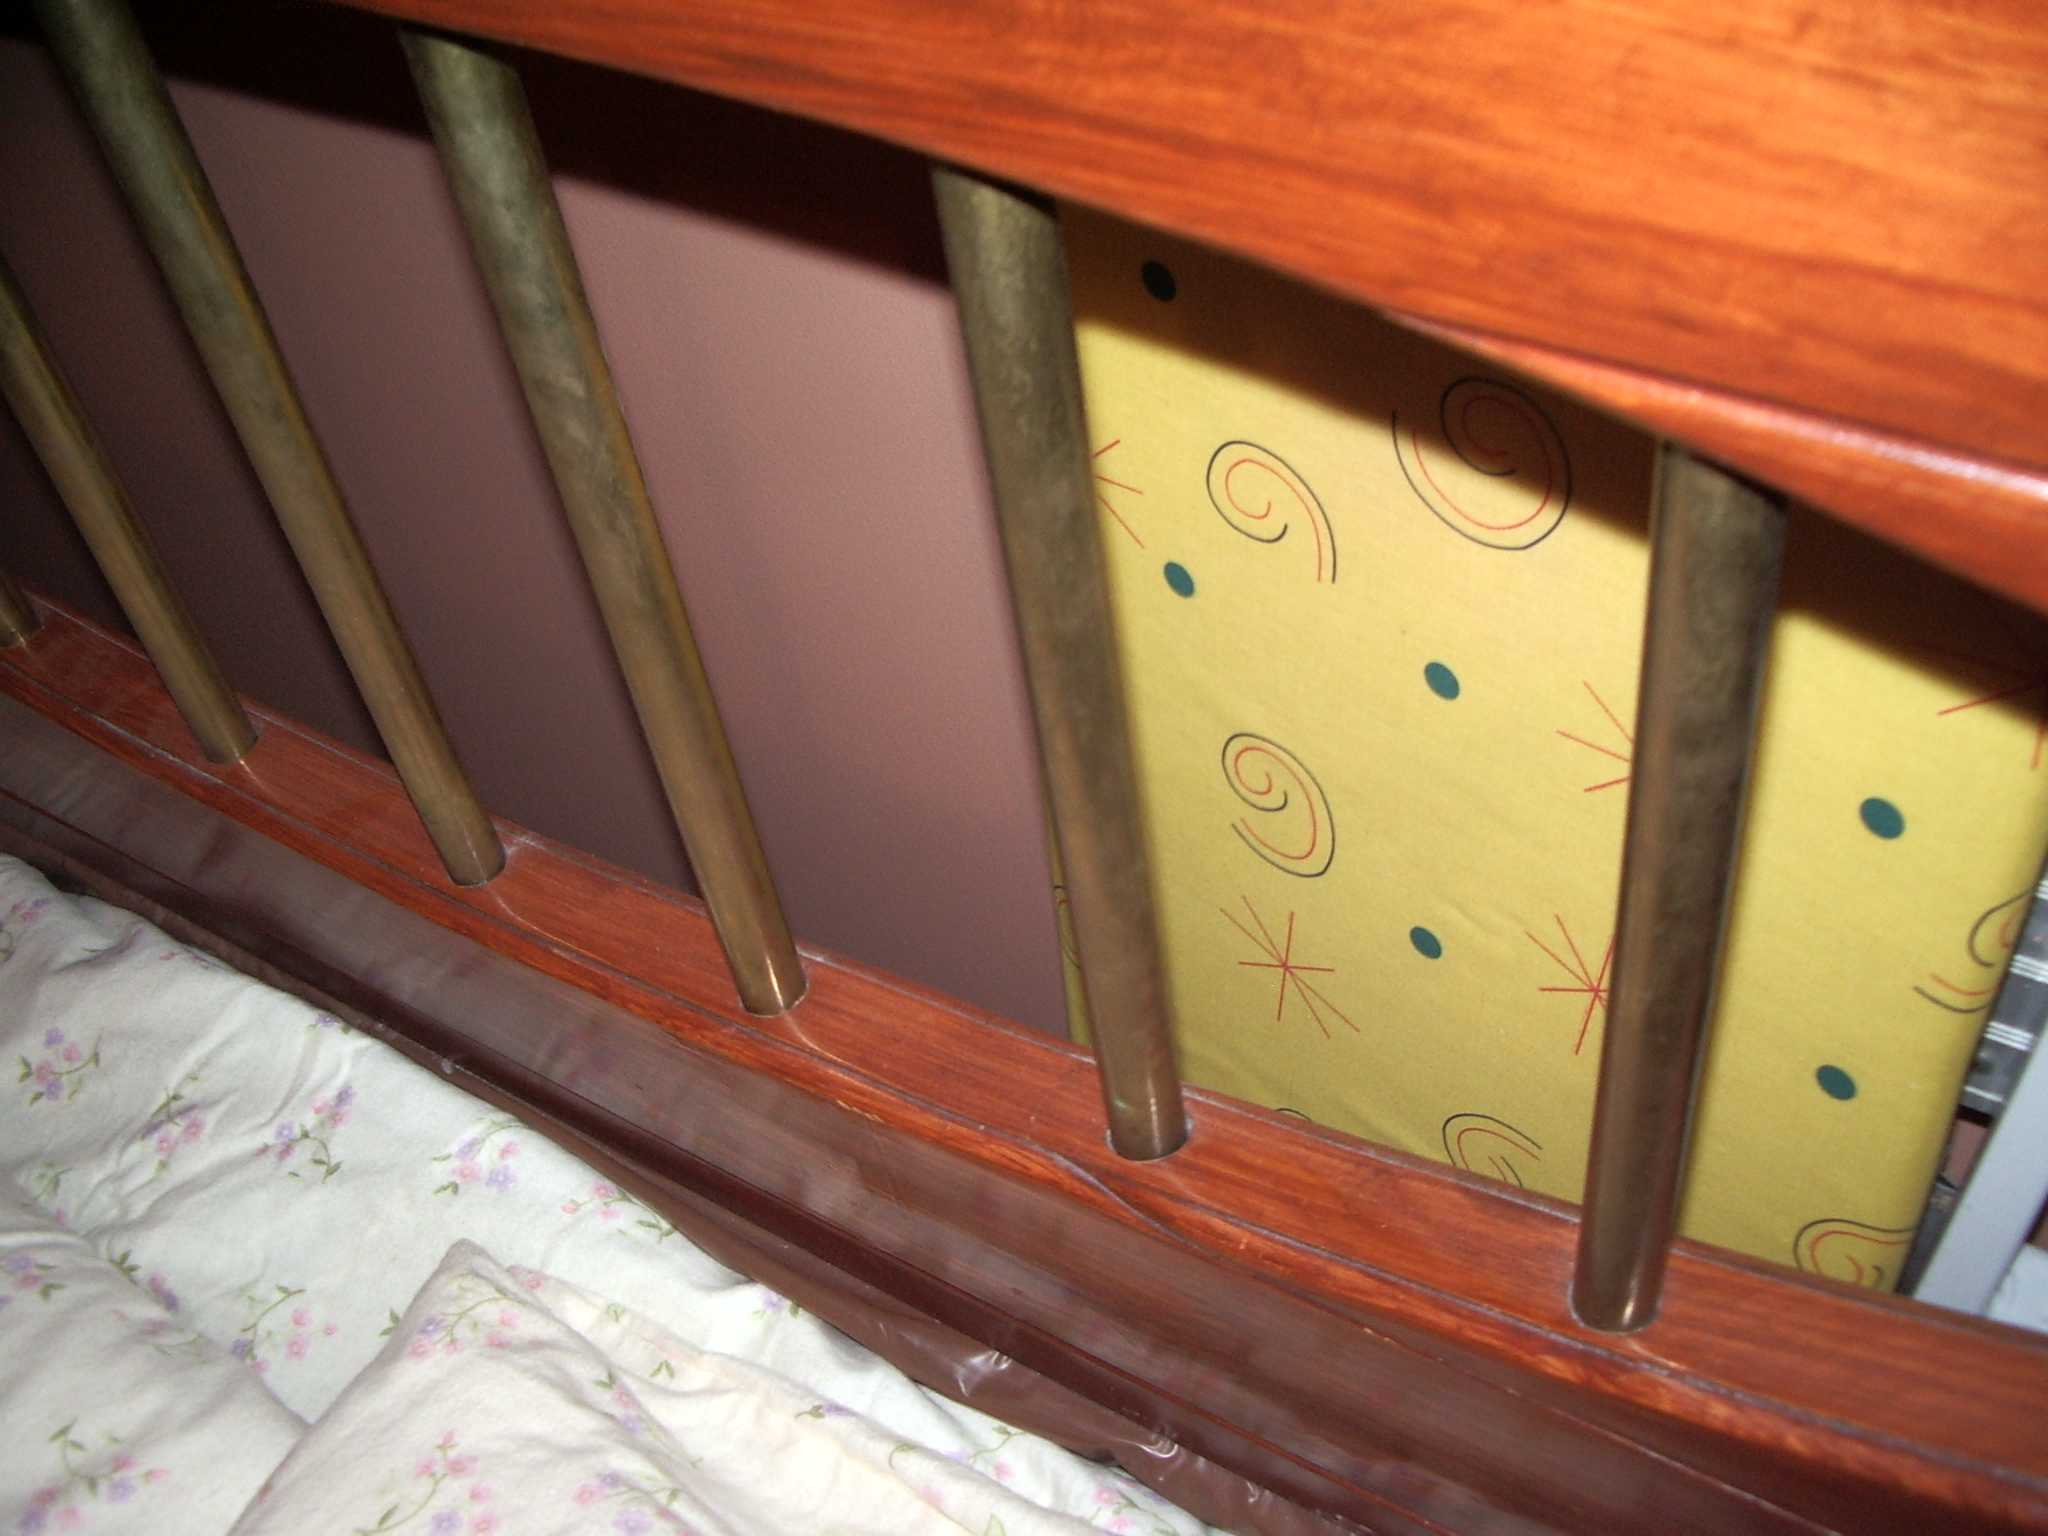 |
| bright brass tubular decoration | the almost perfect curved edge |
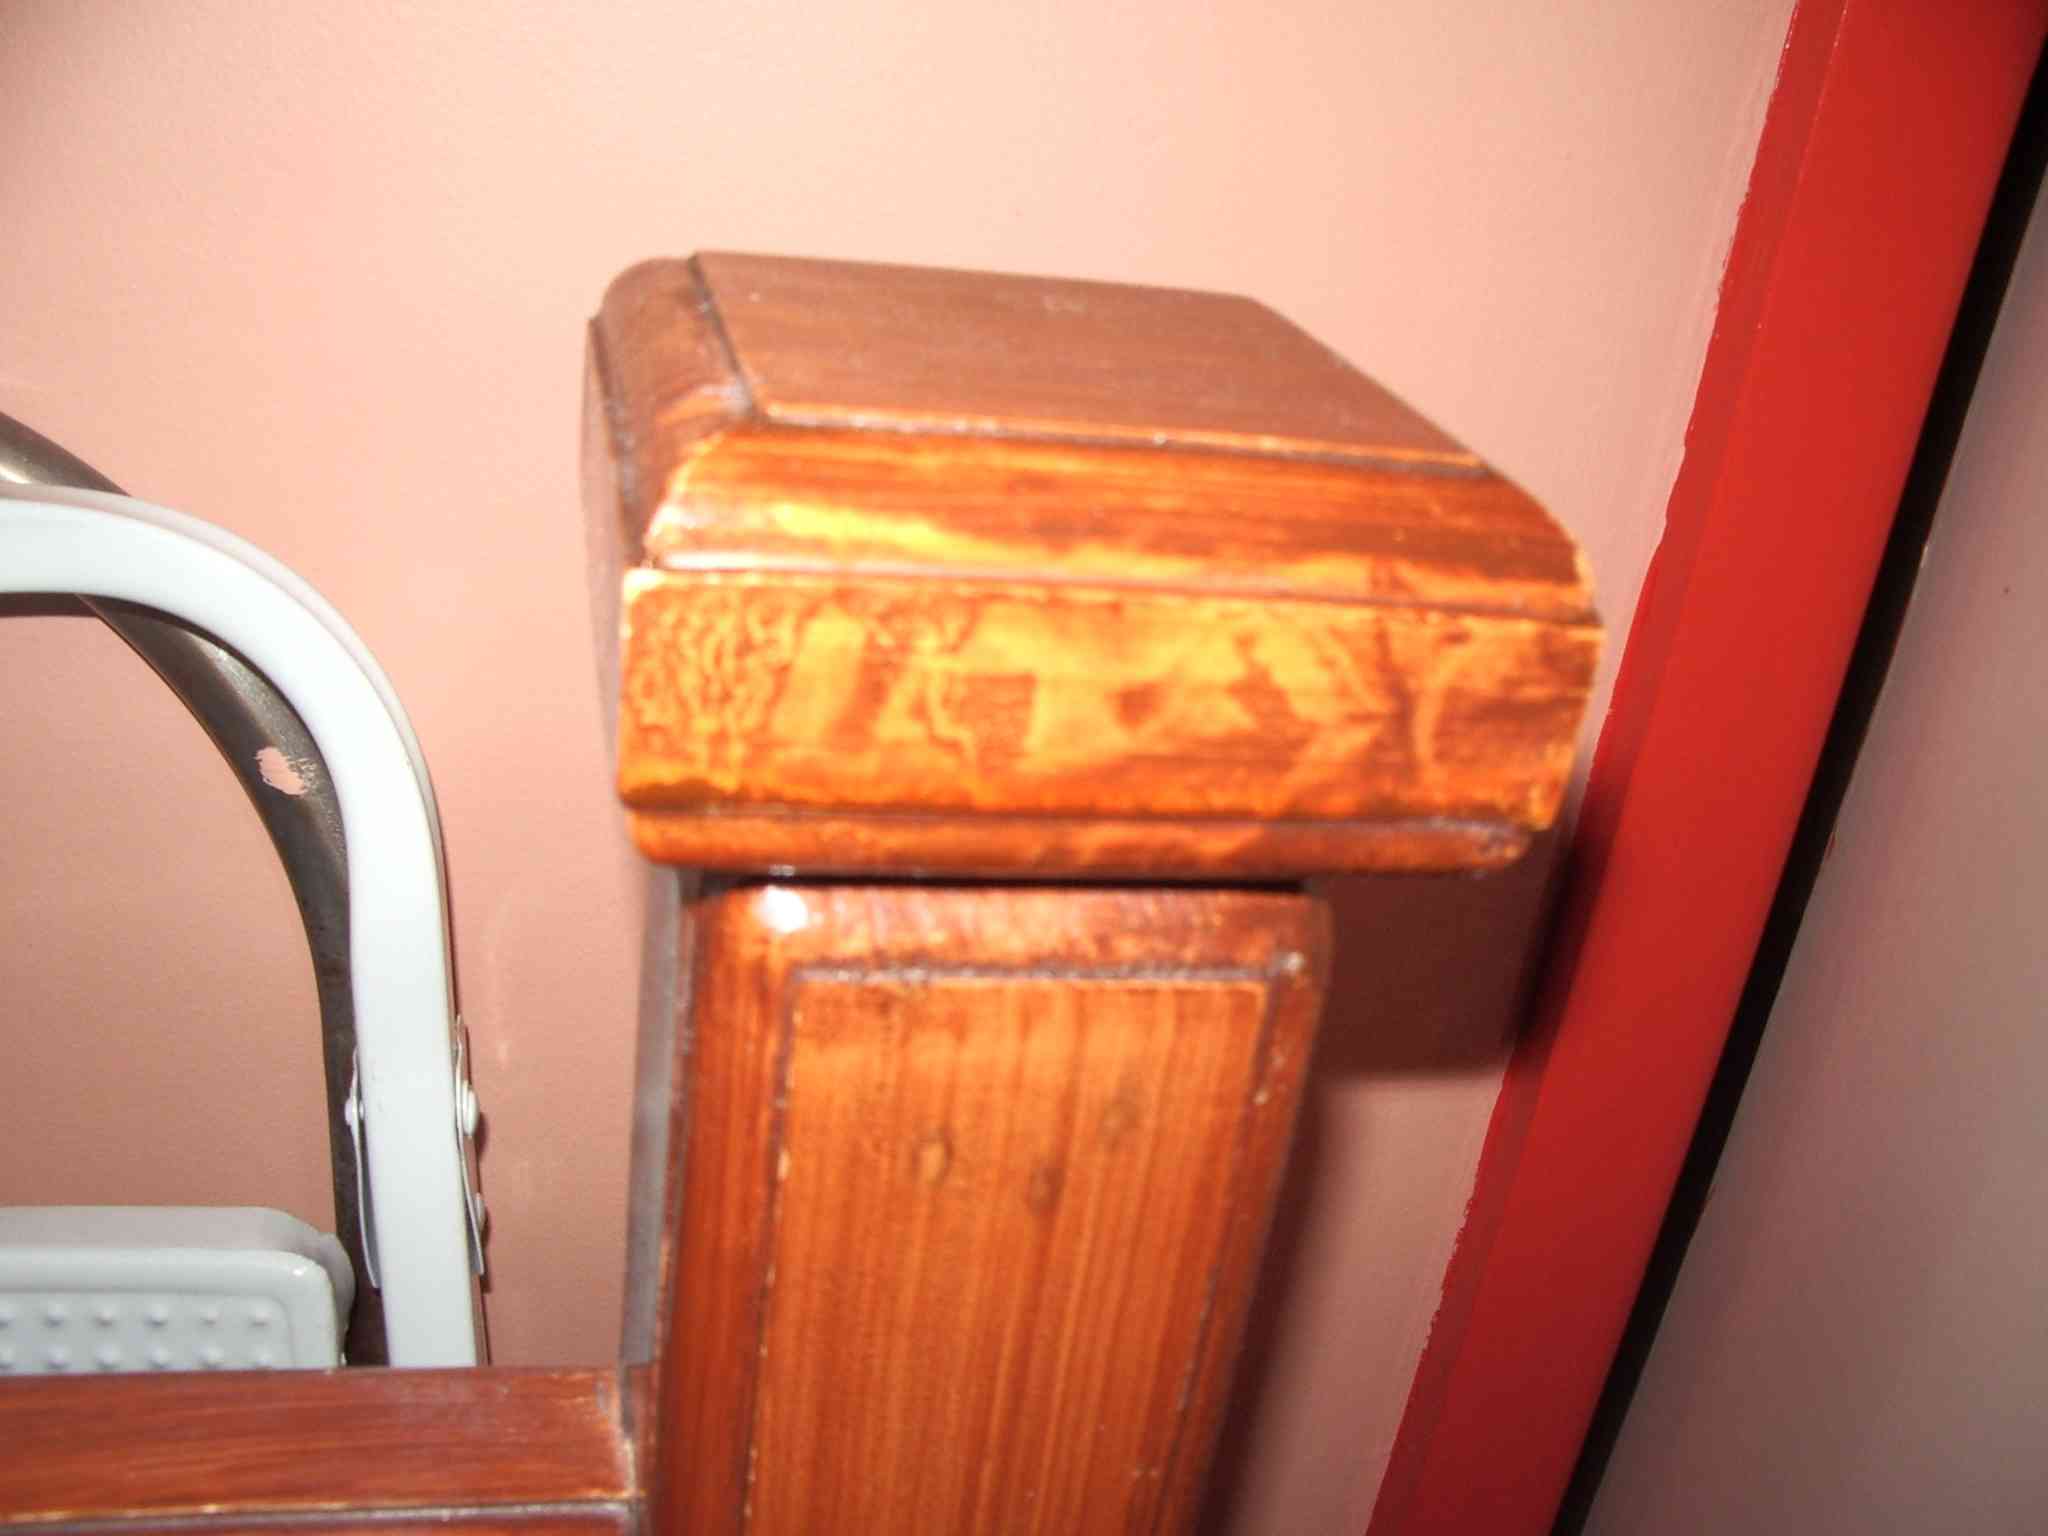 |  |
ornament made from a piece of waste. ancient but not forgotten nail holes are just visible
|
This tight curve was a nightmare with the spoke-shave as this is
planing across the grain. The horizontal board joins could have been
done better. |
 |  |
 |  |
| last image before disposal | last image before disposal |
This item ,with considerable regret, has been consigned to landfill, its purpose fullfilled.
I might reuse the brass pipe, they would make impressive wind chimes.
back to carpentry page
home page
date Mon Apr 14 19:05:18 EST 2008
Thu May 15 19:05:55 EST 2008 ; added extra images