You can make them blink just by scaling them vertically, and translate them around the face.
Tip : Put the eyes in a separate layer to select them more easily, or assign them to a bone

You should be able to get a blinking effect by scaling the eyes. Alternatively , you can get a similar effect by scaling the eye layer - to arrange this, make sure you arrange the origin along the horizontal centre-line of the eyes (or wherever you want the eyes to blink closed - you might wish to put the origin slightly below the centre-line of the eyes).


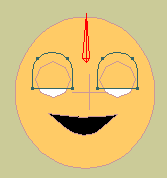
To arrange this we have to make eyeholes in the face shape.
At this point the whites of the eyes, and the pupils/irises, need to be moved below the face level. You may want to move them onto separate layers for easier selection.


Alternatively, you can create separate eyelids - keep them on a level or layer below the face but above the pupils and whites of the eyes.
If you are making separate layers for all these parts, consider collecting them all together under a group layer so as to move and scale them all together..
- Face group
- Face
- Eyelids
- Pupils/irises
- Eye-white

Rather than a simple black circle, you can quickly and easily create irises and pupils as simple shapes in Moho.
Tip : To get exactly concentric circles in Moho, just select one circle, copy and paste (Ctrl-C, Ctrl-V), then scale the pasted circle.
Of course, if you're going anime-ish, you may wish to add more detail, such as this simple eye created from 4 circles (one considerably reshaped, one slightly reshaped) and using a gradient fill.


If you're using simple eyes with even movement in a front-on view of a face, you can just attach both sets of pupils/irises to a single bone, and use that to move them around, or even just move the eye layer directly.
If you'll ever want to move the eyes independently, such as in a cross-eyed look, or if your face is drawn in 3/4 view and the eyes move different distances, you will need to use a separate bone or separate layer for each eye.